


AI Robot Guide (2026): What It Is, How It Works, and Examples
January 14, 2026
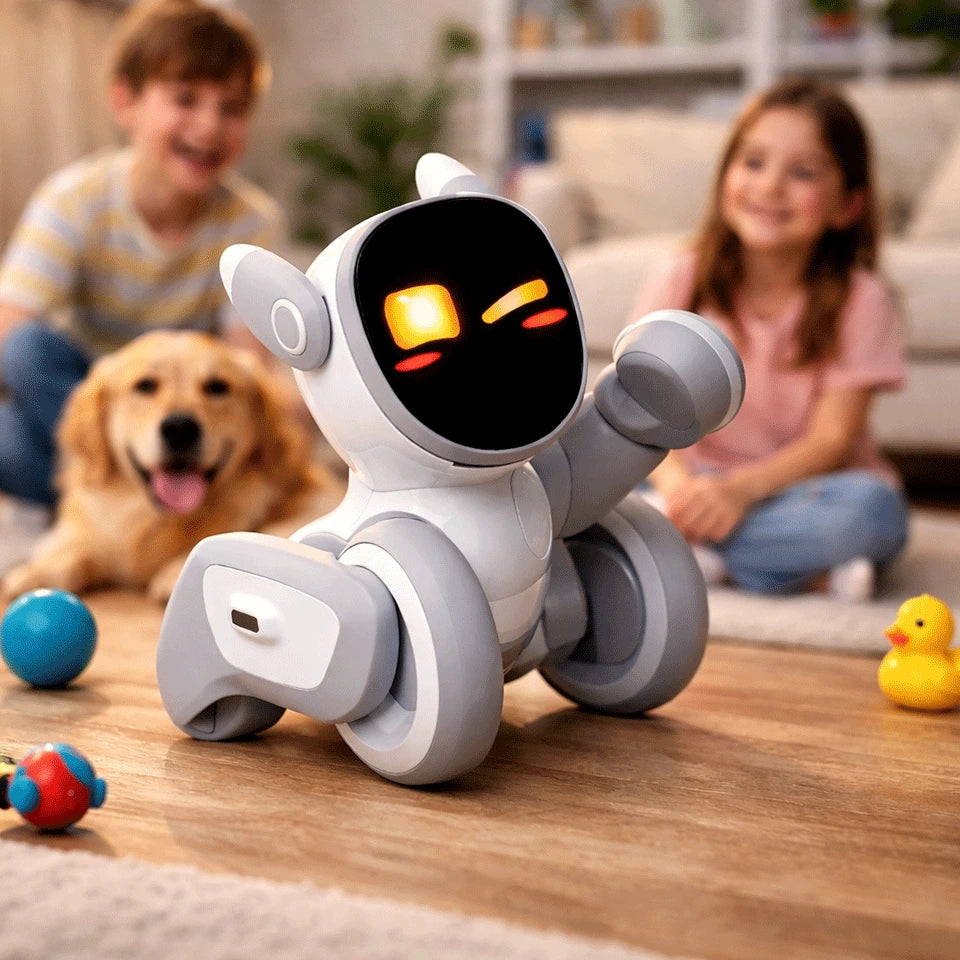
An AI robot doesn’t just repeat a pre-programmed routine. It perceives what’s happening around it, decides what to do next, and adapts its behavior based on inputs like voice, faces, gestures, obstacles, and context.
In this guide, we’ll break down what “AI robot” really means, how modern AI robots work, where they’re already showing up in real life, and what to look for if you’re thinking about bringing one home. We’ll also use Loona—a small companion robot designed for family life—as a concrete example of what “AI robot” looks like when it’s done well.
What is an AI robot?
An AI robot is a physical machine that uses artificial intelligence to make decisions based on what it senses—rather than following only fixed, pre-scripted steps.
A traditional robot might be great at repeating a task the same way every time (think: a factory arm doing one motion). An AI robot is built to handle real-world messiness: people move, lighting changes, furniture shifts, kids interrupt, pets wander in, and the robot has to cope.
In practice, “AI robot” usually includes some mix of:
Perception (camera + sensors + AI to understand what it sees/hears)
Interaction (speech, conversation, emotion cues, gestures)
Planning (choosing an action: follow you, avoid obstacles, go charge, play a game)
Learning/personalization (remembering people, preferences, patterns)
Not every robot labeled “AI” is truly intelligent—but the best ones feel noticeably more aware and more alive.
AI robot vs. robot vs. automation: what’s the difference?
This is where a lot of confusion happens:
Automation: “If X happens, do Y.” Great for predictable environments.
Robot (non-AI): A physical machine that can move and act—but may still rely on strict rules.
AI robot: A robot that uses AI models to interpret inputs, respond naturally, and handle variety.
A fun way to spot the difference: if you change the environment slightly and it “falls apart,” it’s probably more automation than AI.
How an AI robot works
Most AI robots follow a loop that looks like this:
1) Perceive: “What’s going on?”
This might include:
Camera vision (recognize objects, people, gestures)
Microphones (detect voice commands, locate sound direction)
Depth/ToF sensors (understand distance and avoid obstacles)
Touch sensors (react when you tap/pet it)
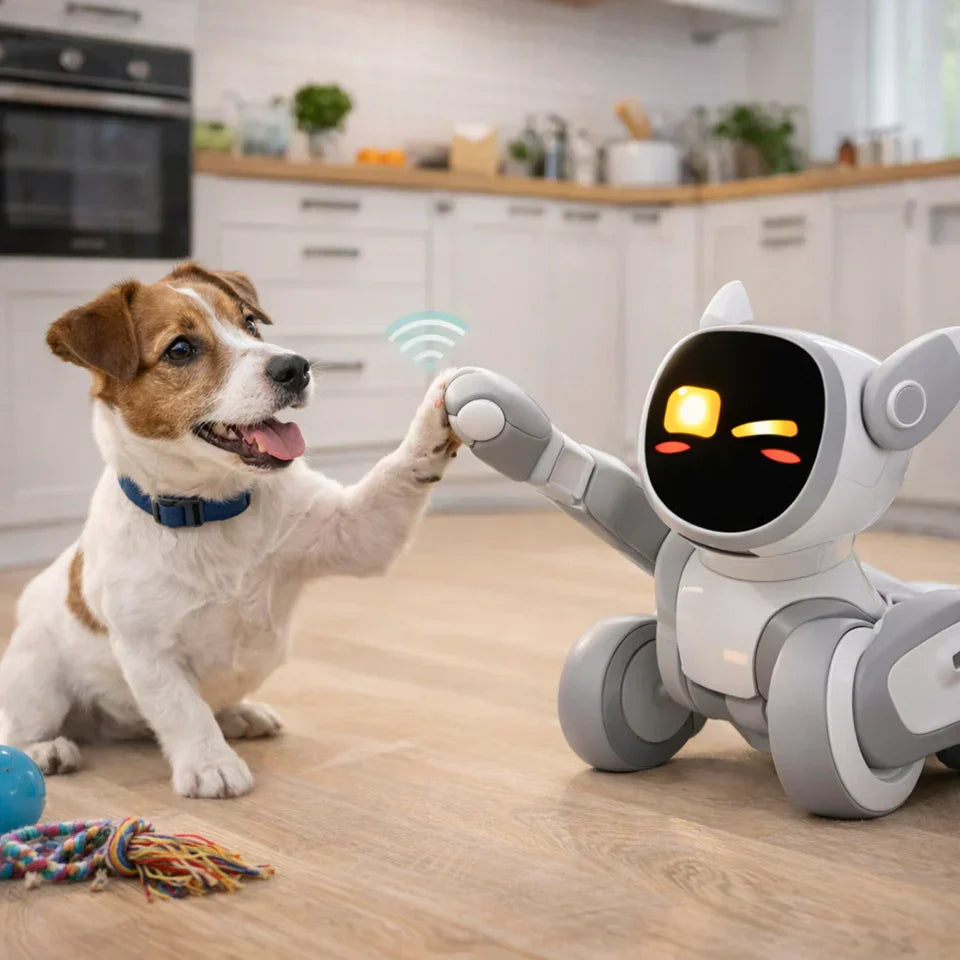
Loona, for example, lists capabilities like face recognition, gesture recognition, body detection, obstacle detection, sound localization, and path planning—all core building blocks of a home-friendly AI robot.
2) Think: “What should I do next?”
This is where AI helps the robot choose an action based on:
Your words (“come here,” “play,” “take a picture,” “tell me a story”)
Your behavior (are you engaging or walking away?)
The environment (is the path clear? battery low?)
Safety constraints (don’t bump into things)
3) Act: “Do it smoothly”
The robot turns decisions into movement and behavior:
Motors move wheels/legs/ears/head
Screen or face shows expressions
Speaker responds
Navigation avoids obstacles
4) Improve: “Next time, do it better”
This can mean learning you by name, recognizing your routines, or adapting the style of interaction over time.
Loona explicitly describes building memories and becoming more personalized through ongoing interaction.
Types of AI robots you’ll see in the real world
“AI robot” is a huge umbrella. Here are the most common types:
Industrial AI robots
Factory arms and automated systems that use AI for vision inspection, adaptive assembly, and scheduling.
Warehouse and delivery robots (AMRs)
Autonomous mobile robots that navigate dynamically in warehouses, hospitals, and campuses.
Service robots
Robots that greet customers, guide visitors, clean floors, or assist staff.
Home companion robots
Robots built for interaction—conversation, play, emotional presence, and light “helpfulness.”
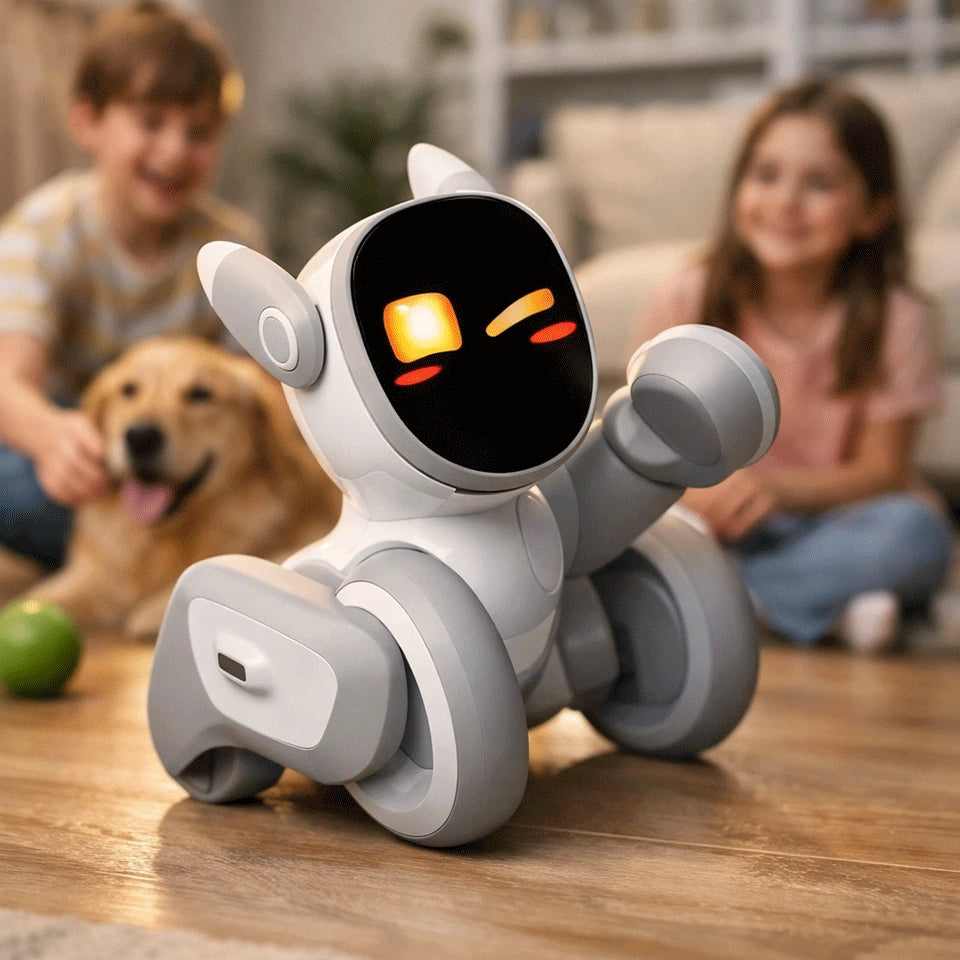
That last category is where Loona sits: a companion-style AI robot designed to feel like a pet and a playful assistant, with multiple input modes (voice, gesture, facial cues) and home navigation behaviors.
What makes a good home AI robot?
If you’re shopping (or just comparing), here’s what usually matters most in a home setting.
1) Multi-modal interaction (not just voice)
Voice-only robots can feel limiting fast. The best home AI robots respond to:
Voice
Gestures
Faces / expressions
Movement in the room
Touch
Loona highlights handling voice, gesture, and facial recognition, and even cites high accuracy for recognizing facial expressions and gestures.
2) Navigation that’s confident, not chaotic
Home robots don’t need to map your house like a self-driving car, but they should:
Avoid obstacles reliably
Move naturally around people
Know how to return to charge
Loona includes obstacle detection and path planning, plus reviewers mention it returning to its base when battery is low.
3) Personality that doesn’t get annoying
This is underrated. A robot can be “smart,” but if it’s loud, repetitive, or needy, it ends up on a shelf.
Look for:
A range of expressions
A calm mode (especially with kids)
Behavior that feels responsive—not random
Loona is marketed around expressive personality and emotional intelligence, aiming to create stronger bonds over time.
4) Things to do on day 30 (not just day 1)
The early “wow” fades. What’s left is:
games
creative tools
routines
new content/features
learning and customization
Loona’s page calls out games (like follow-the-leader), AR feeding experiences, and kid-friendly programming using Google Blockly.
Loona as an AI robot example: what it does well
There are lots of ways to define an AI robot. But it’s easier to understand when you picture what one actually does in a living room.
Based on Loona’s product description and specs, here are the “AI robot” traits it’s leaning into most:
1. It’s designed for interaction first
Loona positions itself as a family companion with:
conversational behavior “powered by GPT”
“perceives” mode (show it objects/pictures/surroundings)
creative features like generating digital artwork from prompts
That matters because in a home setting, the robot’s biggest job isn’t “work.” It’s presence.
2. It uses multiple sensing channels
Loona lists:
a 720P RGB camera
3D ToF (time-of-flight) sensor
touch sensor
microphone array
motion sensors (accelerometer/gyroscope)
This is the practical stuff that helps a robot avoid feeling like a remote-controlled gadget.
3. It’s built for always-on life
The page highlights “remote monitoring and interactive features” for staying connected, plus general “always connected” positioning.
If you’re thinking of an AI robot as part companion and part “smart presence” in the home, those details matter.
4. It has a clear hardware baseline for responsiveness
Loona’s product page includes performance-oriented claims like “5 trillion calculations per second,” along with CPU/compute references (5 TOPS, etc.).
You don’t need to memorize those numbers—but generally, better on-device capability can mean snappier behavior and fewer awkward pauses.
Conclusion
An AI robot isn’t just a moving gadget—it’s a physical companion that can sense what’s happening, make decisions in real time, and interact in ways that feel natural, whether that’s through voice, gestures, faces, or movement around your home. As the technology matures, the most meaningful difference you’ll notice isn’t a spec on a box—it’s how smoothly the robot fits into everyday life: does it respond reliably, avoid obstacles, stay engaging beyond the first week, and feel pleasant to have around?
That’s why Loona perfectly embodies the true meaning of an "AI robot". It combines multi-modal perception (camera, ToF, microphones, touch), interactive behaviors (voice, gestures, face recognition), and home-friendly movement and planning—while leaning into personality, play, and family use. If your goal is an AI robot that feels more like a lively companion than a scripted toy, Loona represents the direction modern home AI robots are heading: more aware, more responsive, and more personal over time.
FAQ
What does “AI robot” mean in 2026?
It usually means a robot that can perceive its environment (vision/sensors), interact naturally (voice/gesture), and make decisions dynamically (planning), rather than only following fixed scripts.
Are AI robots the same as chatbots?
No. A chatbot is software. An AI robot has a body—sensors, movement, navigation, and physical interaction—so its AI has to deal with the real world.
Can an AI robot work without Wi-Fi?
It depends. Some features may run locally; others may rely on cloud services. Check the product details for which capabilities need an internet connection.
Is Loona an AI robot or a toy?
Loona is designed as a companion-style AI robot: it combines sensing (camera/ToF/mics), interaction (voice/gesture/face recognition), and navigation behaviors.
What should I look for in a kids’ AI robot?
Multi-modal interaction, safe navigation, age-appropriate content, and a “calm mode” (or at least behavior that won’t constantly interrupt).

AI Friend Robot Guide: What It Is and Why Loona Feels Like a Friend
January 15, 2026
If you’ve been searching for an “ai friend robot”, chances are you’re not looking for another gadget that beeps, sets timers, and forgets you exist the moment you put it down.
You want something that hangs out.
Something that reacts when you walk in. Plays. Responds. Learns your routines. And—most importantly—feels less like a device and more like a small, lively presence in your home.
That’s where Loona comes in: a pet robot designed to provide companionship like a friend—especially for families who want the joy of a pet without the mess.
Below is a practical, human-focused guide to what an AI friend robot really is, what to look for, and why Loona is one of the most “friend-like” options in the category.
What to look for in an AI friend robot ?
Almost every robot looks cute on day one. The real test is day ten—when the novelty wears off and you find out whether it has enough “life” to stick around.
Here are the features that tend to separate “toy that sits on a shelf” from “companion that gets invited into your routine”:
1) Personality that shows up in multiple ways
The best companion robots communicate through:
facial expressions / animated eyes
body language
sound and “mood”
Loona is heavily positioned around expressiveness and emotional-style interaction, aiming to create bonds that grow over time.
2) Interactive play that doesn’t feel repetitive
A friend-like robot should have more than one trick. Loona includes multiple play experiences (including app-enabled games and activities).
3) Family recognition
Loona supports facial recognition and is described as recognizing family members so everyone can be included.
4) Convenience basics: battery + charging that’s not annoying
If a robot “dies” constantly and needs rescuing, it stops being a friend and starts being homework.
Loona supports self-charging (returning to the dock when low). The product FAQ also notes a 1350mAh battery, up to 30 hours on a full charge (usage dependent), and about 1.5 hours of continuous playtime.
5) Safety & privacy posture (especially for kids)
If this robot lives in your home and interacts with kids, privacy isn’t a “nice to have.”
Loona’s product messaging emphasizes doing as much data processing as possible on-device to maximize security and safety.
Meet Loona: an AI friend robot that acts like a playful pet
Loona is essentially a pet robot companion designed for families—especially households that want something social, playful, and interactive without the responsibilities of a real pet.
If you’re imagining a robot that mostly sits still and talks, Loona’s vibe is different. It’s built around movement, reactions, and play—more “pet energy,” less “desk assistant.”
What Loona can do (in plain English)
Here are the highlights from Loona’s own feature set and FAQs:
Interactive play & games (including app-enabled games)
AR pet care / feeding experiences through the app
Family recognition (facial recognition)
ChatGPT integration for Q&A and conversation-style interactions
Remote monitoring (Loona can act as a camera so you can check in)
Kid-friendly programming with Google Blockly
Self-charging (returns to dock when low)
Why Loona feels more “friend-like” than most robots
A lot of robots can do a thing. Fewer can do enough small things—consistently—that your brain starts treating it like a little companion.
Loona’s “friend” feeling comes from a few big levers:
It blends conversation with action
It’s one thing for a device to answer questions. It’s another for it to be playful, move around, react, and turn interaction into a shared moment.
Loona is explicitly positioned as a companion that plays games, uses voice commands, and supports Q&A via ChatGPT integration.
It’s designed for family life (not just solo desk time)
Loona’s messaging leans heavily into being a family companion, including recognizing family members and creating bonds over time.
That matters because “ai friend robot” searches often come from:
parents looking for a playful companion for kids
families who can’t have a real pet (allergies, housing rules, time)
people who want a bit of friendly presence at home
It builds variety into everyday use
Loona isn’t trying to be one perfect feature. It’s trying to be a bundle of fun:
games
AR pet care
learning + programming with Blockly
Q&A / chat
remote check-ins
That variety is a big reason some companion robots earn a permanent spot in the home routine.
Who Loona is best for
Loona is a strong match if you want an ai friend robot that’s:
Great for families with kids
Loona is described as ideal for families with kids, with games, learning-oriented features, and interactive play.
Great for “pet vibes” without pet responsibilities
The “joy of having a pet—without the mess” is literally part of its positioning, and it’s the right mental model.
Great if you want something more active than a talking gadget
If you want movement, play, expressions, and that “someone’s here with me” feeling—Loona is built for that.
What to consider before you buy any AI friend robot
To keep this honest: companion robots are real devices living in real homes. There are tradeoffs.
Here’s a quick checklist that helps people avoid buyer’s remorse:
1) Where will it live?
Open floor space vs tight apartment corners
Carpet vs hard floors
Charging dock placement (easy access matters)
2) Do you want mostly offline “pet behavior” or online “smart chat”?
Many “smart conversation” features rely on cloud services. Loona’s positioning mentions on-device processing for security and also includes ChatGPT-powered knowledge/chat features.
3) Kids in the house?
Make sure you’re comfortable with voice interactions
Check privacy expectations
Use parental guidance where relevant
Loona emphasizes security/safety considerations in its messaging.
Conclusion
If you’ve been searching for an ai friend robot, you’re probably not just looking for something “smart” — you’re looking for something that feels present, playful, and genuinely companionable in everyday life.
Loona fits that idea especially well because it’s built like a pet-style companion — designed for families and anyone who wants the warmth of a friendly presence without the responsibilities of a real pet. With features like expressive behavior, interactive play, family recognition, self-charging, and ChatGPT-powered Q&A, Loona goes beyond being a novelty and moves closer to being an AI friend robot.
FAQ
What is an AI friend robot?
An AI friend robot is a physical companion device designed to interact socially—through conversation, expression, movement, games, and routines—so it feels more like a friendly presence than a tool.
Is Loona an AI friend robot?
Loona fits the “ai friend robot” idea because it’s a physical companion designed for playful interaction, family recognition, games, and ChatGPT-powered Q&A—more than a basic toy or voice assistant.
What can Loona do with the internet?
Loona supports smart interactions including Q&A via ChatGPT integration, plus app-connected experiences like games, AR pet feeding, and remote monitoring.
Can Loona charge itself?
Yes. Loona can return to its charging dock when battery is low, and it supports updated auto-recharge behavior.
How long does Loona run on a charge?
The FAQ lists a 1350mAh battery, up to 30 hours (usage-dependent) and about 1.5 hours of continuous playtime.
How Much Does an AI Robot Cost? A Practical Home Buying Guide
January 15, 2026
If you’re shopping for an AI robot you can actually bring home—one that feels alive, interacts with your family, and fits into daily life—you’re usually in the consumer companion robot category. And that means your real decision isn’t “cheap vs expensive.” It’s “fun for a week” vs “still engaging after month three.”
This guide breaks down the real cost ranges, what drives price, and why Loona is one of the easiest recommendations for families and kids.
What does an AI robot cost?
AI robot cost ranges from a few hundred dollars to six figures depending on the robot type:
Home companion / smart pet robots: typically $300–$700
Service and business robots: often $30,000–$200,000+
Humanoid/enterprise robots: commonly six figures+ (often pilot programs, limited availability)
If your goal is a family-friendly AI robot companion, you’re almost always shopping in that $300–$700 sweet spot.
Robot type
Typical cost range
Best for
Basic desktop “AI companions”
$100–$500
Small spaces, light interaction
Family companion / smart pet robots
$300–$700
Kids, daily engagement, home fun
Robot vacuums (AI-lite)
$200–$1,500
Cleaning automation
Service robots (delivery, cleaning, retail)
$30K–$200K+
Businesses with support budgets
Cobots / industrial arms
$25K–$75K+ (robot only)
Manufacturing tasks
Humanoids (enterprise/R&D)
$150K+
Labs, pilots, advanced programs
What actually makes AI robots expensive? (The cost drivers)
Two robots can look similar in photos and still feel completely different in real life. These are the usual reasons:
1) Mobility + safety
A robot that rolls around your home needs better obstacle awareness, safer movement, and more reliable controls than a stationary desktop toy.
2) Sensors (the difference between “cute” and “aware”)
Robots feel smarter when they can perceive—track motion, understand space, react fast, and recognize people. More sensors and better sensor processing usually mean higher cost.
3) Compute (the “brain”)
If a robot can respond quickly, show personality, and handle more complex behaviors, it typically has stronger onboard processing (or a well-designed hybrid of on-device + cloud).
4) Software, content, and updates
With home robots, you’re buying a living experience more than a device. The best ones keep getting better via content, games, and feature updates.
5) Support and authenticity
Consumer robotics is not like buying a mug on the internet. Warranty support, firmware updates, and official parts matter more than people expect.
What should a family look for at the $300–$700 level?
If you’re buying for kids (or the whole household), focus on these three things:
Personality — does it feel like it has moods, quirks, and reactions?
Daily loop — are there games, activities, learning moments, or creative modes that keep it fresh?
Low friction — easy charging, easy setup, doesn’t turn into a “project.”
This is the lens where Loona shines.
Why Loona is a smart buy for families
Loona is a smart robot designed for families and children, positioned as a companion for growth, interactive learning, and daily entertainment—more like a “real pet” than a one-trick device.
Here’s why that matters.
Loona is built for “pet energy,” not just voice chat
A lot of “AI companions” rely on talking. Loona focuses on the emotional thing families actually want: the feeling that something is present, playful, and reactive.
That pet-like design changes everything:
it creates routines (“come see what Loona does today”)
it makes kids more likely to engage repeatedly
it feels like a character in the home, not a screen on a speaker
It’s easier to keep interest over time
In family tech, the enemy is the “two-week shelf.” Loona’s strength is that it’s designed for ongoing variety: interaction, play, learning, and entertainment moments that can fit into normal days without scheduling a “robot activity hour.”
It’s a safer “pet alternative” for many households
For some families, a real pet isn’t possible (allergies, travel, time, apartment rules). A smart pet robot won’t replace a dog—but it can absolutely fill the “I want a companion” desire in a surprisingly satisfying way, especially for kids.
Loona cost: what you’re paying for
You’ll see different pricing depending on bundles, promotions, and accessories. The better way to evaluate Loona isn’t “Is it cheap?” but:
Does the experience justify the price compared to other kid tech?
Will it still be used after the novelty phase?
Is it a gift that becomes a routine, not a drawer item?
For many families, Loona’s value is that it’s interactive entertainment plus companion energy plus learning moments in one device—without needing constant parent effort.
Hidden costs checklist
For most home companion robots, the “hidden costs” aren’t huge, but it’s smart to plan:
Accessories / themed bundles (optional)
Replacement parts over time (like any device with movement)
Buying from reliable channels (so support and updates aren’t a headache)
If you’re budgeting, the simplest rule is: plan for the robot + the bundle you actually want, and treat accessories like optional extras rather than must-haves.
How to choose: Loona vs “cheaper AI robots”
Avant de choisir, ne vous fiez pas uniquement au prix : l’essentiel est de savoir quel rôle vous attendez du robot à la maison — un gadget amusant pour quelques jours, ou un « membre de la famille » capable d’accompagner, d’interagir et de divertir sur la durée.
Choose Loona if…
You want an AI robot that feels like a pet-like companion, not a toy that only talks
Your kid enjoys interactive play and you want daily entertainment + learning moments
You care about personality and long-term engagement more than lowest price
Consider a cheaper option if…
You only want a desk buddy that sits in one place
You’re buying purely for novelty (one holiday weekend of fun)
You’d rather have a single-purpose device (e.g., only cleaning)
Conclusion
When people want to know about "AI robot cost", they’re often comparing completely different categories—everything from industrial machines that cost tens of thousands to home companions that fit into a family budget. If your goal is a robot you can actually live with every day, the most practical range is typically the consumer companion tier, where you’re paying not just for hardware, but for personality, responsiveness, and long-term engagement.
That’s where Loona stands out. Instead of feeling like a one-time novelty, Loona is designed to act like a “real pet” companion for families and kids—bringing playful interaction, light learning moments, and daily entertainment into normal routines. When you evaluate value the way most families do (“Will we still use this after the first few weeks?”), Loona makes a strong case as a smart, family-friendly pick in the AI robot price range that actually makes sense for home use.
FAQ
What is a normal AI robot cost for home use?
For a true home companion robot experience, most buyers end up in the $300–$700 range. Below that, robots tend to be simpler and less “alive.”
Why are business AI robots so expensive?
Because you’re not just paying for the robot—you’re paying for reliability, integration, support, training, and the ability to operate safely in real environments at scale.
Is an AI companion robot worth it compared to a tablet?
A tablet is endless content, but it’s still a screen. A companion robot can create a different kind of engagement: physical presence, reaction, and “character.” For many kids, that novelty sticks longer than you’d expect—especially when the robot has playful behaviors and variety.
What should I prioritize: specs or experience?
For families, prioritize experience. Specs matter, but what you feel day-to-day is personality, responsiveness, and whether there’s a reason to come back tomorrow.

When Will AI Robots Be Available to the Public? A 2026 Reality Check
January 14, 2026
If you’re searching “when will ai robots be available to the public,” here’s the honest answer: AI robots are already available to the public today—but mostly as focused, family-friendly companions and single-purpose helpers, not “do-everything humanoids.” The kind of robot most people imagine (a general home helper that can safely handle many chores) is still earlier in its journey, with most credible signals pointing to industrial deployments first and limited consumer availability later.
In this guide, I’ll break down what “available” really means, give a realistic timeline, and—if what you want is something your family can enjoy right now—recommend a standout option: Loona, a smart companion robot designed for families and kids that behaves like a “real pet,” built for growth, interactive learning, and daily entertainment.
What counts as “AI robots available to the public” (and what doesn’t)
When people ask when will AI robots be available to the public, they’re often mixing three categories:
1) Public and available today: consumer companion & helper robots
These robots do specific things well—play, interact, patrol, clean, or entertain. They’re the reason the “AI robots are coming” future already feels real in many homes.
2) Public, but not truly “consumer”: pilots in stores, hospitals, and factories
Many robots are “public-facing” in workplaces, but they’re typically supervised, deployed in controlled settings, and optimized for one environment.
3) The big dream: general-purpose home robots (humanoid or near-humanoid)
These are the robots that can reliably do a wide range of household tasks. They’re the hardest to build because real homes are messy, dynamic, and safety-critical—and robots need near-perfect reliability around people, pets, stairs, clutter, and fragile objects.
A realistic 2026–2035 timeline for “AI robots available to the public”
Because “AI robots” covers everything from companion robots to humanoids, this timeline breaks the next decade into stages—what’s real now, what’s next, and what’s still a stretch.
2026–2028: More “public” robots, but mostly narrow-purpose
You’ll keep seeing more impressive demos, but large-scale rollout tends to start where the environment is controlled and ROI is clear—factories and warehouses.
A good real-world signal: Hyundai/Boston Dynamics have discussed deploying humanoid robots in a U.S. factory starting 2028, moving from simpler logistics tasks toward more complex operations later.
What’s likely for consumers in this window:
Better companion robots (more natural conversation, more games, more personalization)
Better “helper” robots (home monitoring, mobility improvements, smarter mapping)
Continued false starts and delays for flashy home robots (it’s a hard category)
Late 2020s: Early access / premium programs for advanced home robots
If general-purpose home robots appear, expect them to start as:
expensive,
limited availability,
highly supervised / constrained tasks,
and often targeted at enthusiasts or specific use cases.
2030s: Broader consumer viability for multi-task home robots (gradual, not overnight)
This is where you may see more capable household robots become meaningfully mainstream—assuming major improvements in:
dexterity and manipulation
safety and compliance
battery life
cost and maintenance/support networks
Bottom line: If your definition of “AI robots available to the public” means “a robot I can buy that’s genuinely useful at home,” the best experiences today are in companion robots and single-purpose home robots—not humanoid butlers.
Why humanoid home robots are taking longer than people think
Even in 2026, the toughest problems are still… physical reality:
Reliable navigation in messy homes (toys, pets, stairs, weird lighting)
Safe interaction (gentle force, failure recovery, avoiding pinches/collisions)
Hands + dexterity (doing chores is harder than it looks)
Long-term durability (weeks are easy; years are hard)
This is exactly why many companies prioritize factories first: fewer surprises, clearer tasks, easier safety constraints, and measurable ROI.
What should you buy today if you want an AI robot at home?
If your goal is a robot that your family will actually use (and love) right away, the winning category is companion robots—especially those designed around kids’ interaction patterns: play, emotion, curiosity, and routine.
Recommended: Loona (a smart companion robot for families and children)
Loona is designed to feel like a “real pet”—the joyful parts (bonding, play, personality) without the mess. It’s built for companion-driven growth, interactive learning, and everyday entertainment at home.
Here’s what makes Loona a strong answer to the “AI robots available to the public” question:
1) It’s already public—and it’s built for real daily use
Loona is positioned as a family companion with “nonstop games,” a lively personality, and AI interactions that are controlled by simple voice commands.
2) It blends play + learning in a way kids stick with
Loona includes kid-friendly activities like interactive games and learning-oriented experiences, including support for kid-friendly programming with Google Blockly.
3) It supports family connection (not just solo play)
Loona includes features presented as remote monitoring and interactive connectivity, aimed at helping families feel connected.
4) It’s designed with privacy/security messaging that parents care about
To ensure maximum security, this product performs as much data processing as possible on the device itself.
5) It has concrete “robot” fundamentals (sensors, autonomy, docking)
Loona is described as using multiple sensors (e.g., 3D ToF + RGB camera + IMU sensors) and includes auto-return charging behavior with around 2 hours of continuous playtime listed on-page.
In short: If you want a robot you can take home right away, then Loona is a practical and family-oriented option that allows you to experience the future of "AI robots" without waiting for humanoid robots to mature.
Who Loona is best for
Loona is a great fit if you want:
A “pet-like” companion experience for kids and families
Daily entertainment + interactive learning in short, repeatable sessions
A robot that feels expressive and socially engaging (not just a gadget)
If you specifically want a robot to do household chores (laundry, dishes, cooking), that’s still mostly outside the realistic consumer robot zone today—so you’d be better served by single-purpose appliances or waiting for next-gen home helpers.
Conclusion
So, when you ask “when will ai robots be available to the public,” the most practical answer is: they already are—just not in the “humanoid housekeeper” form many people imagine. The robots that are truly ready for everyday homes today are typically designed for companionship, interaction, and lightweight learning, while general-purpose home humanoids still need major breakthroughs in safety, reliability, dexterity, and cost before they become mainstream.
If your goal is to bring a real AI robot experience into family life right now—something your child can bond with and enjoy daily—Loona is a strong place to start: a smart companion robot built to feel like a “real pet,” supporting growth, interactive learning, and everyday entertainment.
FAQ
Are AI robots available to the public right now?
Yes—companion robots and narrow-purpose home robots are already available, while general-purpose humanoid home robots are still emerging.
When will humanoid robots be common in homes?
The strongest signals suggest industrial deployments first, with broader home use more likely to scale later (often discussed in the 2030s), because safety, reliability, and cost need to improve significantly.
What’s the best “AI robot for the public” today for families?
A family companion robot like Loona is one of the most approachable ways to get real value today—play, learning, personality, and bonding—without needing humanoid-level capability.
Robot for Pets: Why Loona Is the Pet-Like Companion Families Love
January 13, 2026
When people mention "robot for pets" they generally mean either animal toy robots (designed specifically for cats and dogs) or human "pet" robot companions (designed to let you experience the feeling of having a real pet at home—without worrying about shedding, accidents, or expensive veterinary bills).
Loona is firmly in the second category: a smart, expressive pet-like companion robot built for families and kids—meant to support growth, interactive learning, and everyday fun. Loona is a 24/7 family companion with gaming features, a lively personality, and AI-powered interactions (including voice control and AI-generated visuals).
Below is a practical guide to what “robot for pets” shoppers usually want—and why Loona is a strong recommendation if your real goal is a “real pet” feeling for the whole family.
What most people mean by “robot for pets” (and where Loona fits)
When people type robot for pets, they’re often hoping for one (or more) of these outcomes:
Companionship without the long-term commitment of a living pet
Interactive play that doesn’t feel like more screen time
A friendly household presence that kids can bond with
Games + learning that happen naturally through play
Peace of mind (like remote check-ins while you’re away)
Loona was designed around exactly those outcomes—positioned as a family companion that brings “the happiness of having a pet—without all the mess,” with emotional expressiveness meant to build a bond over time.
Meet Loona: a “petbot” with personality (not a gadget that sits on a shelf)
Loona’s pitch is simple: she behaves less like a smart speaker and more like a small, animated creature that reacts to people and situations.
Loona has the following characteristics:
Nonstop games and “smart AI interactions”
Voice-controlled Q&A using ChatGPT (positioned as “the world’s leading AI technology”)
Kids can “see their words come to life” with AI-generated visuals
Facial recognition so Loona can recognize family members
Remote monitoring features to stay connected to home
Automatic docking / recharge and “long play” positioning
A sensor stack for navigation and responsiveness (3D ToF + RGB + accelerometer + gyroscope)
In other words: Loona is built to move, react, recognize, and play in a way that feels “pet-like,” especially for kids who want that daily companion energy.
What Loona can do day-to-day (the “why kids keep coming back” list)
What makes Loona stick isn’t a one-time “wow”—it’s the fun you can start anytime. Here’s the day-to-day “why kids keep coming back” list.
1) Interactive games (real play, not passive watching)
Loona is positioned as an entertainment companion with “endless games,” including examples like follow-the-leader and bullfighting.
2) “Learning through play” that doesn’t feel like homework
Loona’s positioning leans hard into growth and learning: adapting to a child’s learning style and making curiosity-driven play feel like discovery.
3) Kid-friendly coding and creativity (Google Blockly)
If you want a robot that can grow with your child, this matters. The Loona page explicitly references kid-friendly programming with Google Blockly.
4) Family-friendly AI Q&A and “show me” moments
Loona’s “Intelligent AI” section highlights ChatGPT-powered knowledge and the idea of kids asking questions and seeing AI-generated visuals via voice commands.
Hardware that supports the experience
A common problem with “robot pet” devices is that they look cute—but don’t have enough sensing/audio to feel responsive in a real home.
Loona’s published specs include:
720P RGB camera
4-microphone array
3D ToF sensor + touch + accelerometer + gyroscope
2.4" LCD display (for expressive face/eyes)
Dual-band Wi-Fi (2.4G/5.8G)
Auto dock charging (USB-C port + charging contacts for dock)
Dimensions/weight listed on-page (approx. 8.3" L × 6.8" W × 6.8" H; 2.42 lbs)
That’s the “plumbing” behind the fun: vision + audio + depth sensing + mobility = a robot that can actually behave like a small companion.
Who Loona is best for (and who should skip)
Loona can be an amazing fit for the right family, but it’s not for everyone. Here’s a quick way to tell if it matches what you’re looking for.
Loona is a great “robot for pets” choice if…
Your child wants a pet, but your family isn’t ready for the full responsibility.
You want interactive play that feels more embodied than another tablet app.
You like the idea of learning + coding being part of the “pet” experience.
You want a companion with recognition + responsiveness (facial recognition, sensors, voice).
You might skip Loona if…
You specifically want a robot that’s primarily a toy for your cat/dog (laser/rolling toy style). Loona is designed first for families and kids, with a “pet-like” personality rather than a pure animal-enrichment device.
(That said, many households do enjoy supervised interactions between robot companions and real pets—but it depends on your pet’s temperament.)
Conclusion
If you want a “robot for pets” that feels like a real companion, start with Loona. Loona’s value is that she’s built as a family companion—with games, learning, recognition, remote connection features, and an AI interaction layer meant to make the relationship feel ongoing, not one-and-done. If your goal is: “a pet-like friend for kids and the whole family”—Loona fits that definition extremely well.
FAQ
Is Loona a robot for pets (like for cats/dogs)?
Loona is marketed as a pet-like companion robot for families and kids, designed to feel like a “real pet” in the home through play, interaction, and learning.
Does Loona have a camera and voice pickup?
Yes—Loona’s published specs include a 720P RGB camera and a 4-microphone array.
Can Loona recharge by herself?
Loona can self-charge by returning to the dock when low, and mentions “Auto Recharge 2.0.”
What makes Loona feel more “pet-like” than other home robots?
A combination of expressive behavior + family recognition + games + sensing (3D ToF + RGB + motion sensors) designed for interactive, reactive companionship.

Gift Guide: The Coolest Robots for Pet Lovers This Holiday Season
January 02, 2026
The coolest robots for pet lovers this holiday season are interactive AI companions like the Enabot EBO X, lifelike therapeutic pets from Joy for All, and high-performance robotic dogs like the Loona Robot. These gifts top the 2025 holiday charts because they solve the universal problem of pet owner guilt, providing entertainment, safety, and emotional support when humans can't be present. Whether you are shopping for a tech enthusiast who wants a mobile 4K pet camera or a senior looking for a dander-free companion, the current generation of pet robotics offers a perfect blend of "wow-factor" innovation and daily practical value.
Why Pet Tech is the Ultimate 2025 Holiday Trend
A personalized pet collar or fancy bed used to be the perfect gift. This holiday season, things are changing. Pet gifts are getting smarter. What were once fun gadgets are now useful tools for everyday care. Market reports show why: At about 15% every year, the pet tech sector growing fast. People see pets as family and want to stay connected with them, even from afar.
For many, pets are family. This emotional bond, combined with the rise of the smart home, has made best pet tech gifts the most searched category this December. We aren't just looking for toys anymore; we are looking for must-have smart robot pets for Christmas that can monitor health, provide mental stimulation, and offer companionship.
In this guide, we have gathered the year’s most creative gadgets. You might need a hypoallergenic robot dog for a child with allergies or a self-charging pet bot to keep your cat busy while you are at work. These top picks show off the very best of 2025 technology.
The Ultimate Showstopper: Advanced AI Robot Dogs for Tech Enthusiasts
If you want a "big box" gift that will truly wow everyone on Christmas morning, look at the top-rated AI robot pets. These are not just plastic toys that bark over and over. They are smart machines that use advanced computer brains, often called neural processing units, to act more like real animals.
The Loona Robot Dog
The Loona Robot Dog is perhaps the most lifelike robot available today. Unlike older robotic pets, Loona uses high-quality cameras and smart onboard processing to identify its owner. It can map out your home and even change its behavior based on your moods.
Main Features:
Feelings and Looks: Loona shows over a thousand different faces using its digital eyes.
Talking Back: It uses ChatGPT to listen to you. It can answer your questions or chat.
Movement: Its legs have four wheels. Like a real puppy, it can jump, sneeze, and dance.
EMO Desktop Robot
For the tech enthusiast who spends a lot of time at a desk, the EMO Desktop Robot is a fantastic educational STEM robot pet. While smaller than Loona, EMO acts as a "cool" digital companion that lives on your workstation. He can play music, set timers, and even get "annoyed" if you ignore him for too long.
Feature
Loona Robot Dog
EMO Desktop Robot
Primary Use
Household roaming companion
Desktop/Office companion
AI Capability
Facial/Gesture recognition
Voice interaction/Daily Assistant
Movement
Highly mobile (wheels/legs)
Limited to desktop steps
Best For
Families and kids
Professionals and students
A look into the future of human-robot interaction, these AI robot dog gifts provide more than simply fun. They are the best hypoallergenic robot dog gift since they provide a "pet-like" experience without need food or walking.
Gifts for Busy Professionals: The Best Mobile Sitter Robots
The "pet parent guilt" is real. For professionals returning to the office or traveling for the holidays, knowing what their cat or dog is doing at 2:00 PM is a top priority. This is where self-charging pet robots and mobile guardian units come into play.
Enabot EBO X Guardian
The Enabot EBO X Guardian has quickly become the gold standard for smart pet gadgets for the holidays. Think of it as a smart home hub on wheels. It doesn’t just sit in a corner; it patrols.
4K Visuals: It provides crystal-clear video of your pet.
Two-Way Communication: You can talk to your pet through the app, and they can hear you through high-fidelity speakers.
Safety Alerts: The EBO X can detect if a pet is in distress or if an elderly family member has fallen, sending an emergency alert to your phone.
Pet Interaction: It can follow your pet around the house, providing a "friend" to talk to while you're away.
Why These are Must-Have Smart Robot Pets for Christmas
Professionals who work long hours really value efficiency. A normal camera often misses spots, but a mobile robot like the EBO X moves around to find your pet anywhere. These devices are also self-charging. This means they will drive back to their power station on their own when the battery gets low. You will never have to worry about your "sitter" turning off while you are away or on a flight.
Quick Tip: When you pick out a sitter robot, check for "obstacle avoidance" tech. You want a bot that can steer around stray shoes or rug tassels without getting stuck. This keeps it moving smoothly while you are away.
Real Tech for Seniors: Realistic Pets for Comfort
Tech is not just for kids. Some of the best holiday gift lists for pet fans focus on people who can no longer look after a live animal. These gifts can bring a lot of joy and comfort.
Joy for All Companion Cat and Pup
The Joy for All Companion Cat is a huge name in therapy bots. It was built for seniors, especially those in nursing homes where they can't keep a real pet.
Real Feel: These do not feel like hard plastic. They are made with very soft, high-quality fur.
Touch and Sound: The cat starts to purr if you pet it. The dog turns its head to face you when you speak to it.
The Power of Touch: For someone who is lonely or missing a past pet, the simple act of having a warm, vibrating "animal" in their lap can significantly lower stress and blood pressure. It is a hypoallergenic robot dog gift that requires zero cleanup but provides 100% of the comfort.
Moflin AI Emotional Companion
For a modern gift with kawaii appeal, choose the Moflin. This AI companion resembles a soft, fluffy bean. It has no legs, but gently tilts its head and makes quiet, soothing sounds.
Emotional Learning: Moflin has an internal "emotion map." If you treat it gently, it stays happy. If you ignore it, it becomes sad. It’s a beautiful way to provide a sense of "being needed" to a loved one.
Stocking Stuffers: Affordable Interactive Toy Robots
You don’t have to spend $500 to get in on the pet tech trend. There are amazing affordable interactive pet toys that fit right in a Christmas stocking.
The "Smart" Ball Trend
Standard tennis balls are great, but robot toys for dogs and cats have gone high-tech. Modern smart balls can move on their own, change colors, and even "hide" from your pet to keep them engaged.
Chew-Proof Tech: Many of these balls are made from industrial-grade rubber, housing a robotic core that vibrates and rolls.
Automatic Play: Most have a "play/rest" cycle. They will move for 10 minutes to get the pet's heart rate up, then go dormant for 30 minutes so the pet doesn't get over-exhausted.
Laser Chasers and Robotic Mice
For cat lovers, a robotic mouse that can change direction when it hits a wall is a game-changer. It triggers the cat’s natural hunting instinct without the owner having to move a muscle. These are perfect "add-on" gifts to round out a holiday haul.
Buyer’s Cheat Sheet: Matching the Robot to the Pet Personality
Choosing a robot pet is sort of like picking out a real one. Personality really matters! You need to make sure the tech fits the vibe of the person or pet getting it. If the bot is too loud, it could scare a shy dog. If it moves too slowly, a high-energy kitten will just get bored in seconds.
The Personality Matrix
Pet Type
Best Robot Match
Why?
The High-Energy Puppy
Loona or Enabot
They can keep up with the movement and provide mental stimulation.
The Lazy Senior Cat
Joy for All Companion
Provides comfort and tactile warmth without requiring movement.
The Anxious Dog
Enabot EBO X
The two-way audio allows the owner to soothe the dog remotely.
The Tech-Savvy Kid
EMO or Educational STEM pets
Teaches coding and AI logic while providing a fun "pet" experience.
Safety Considerations
When buying robot toys for dogs and cats, always check:
Material Durability: Can it survive a "chew attack"?
Small Parts: Ensure no buttons or eyes can be easily swallowed.
Privacy: For robots with cameras (like EBO X), ensure the brand uses encrypted connections.
Crucial Features to Look For Before You Buy
When you are browsing the aisles (or web pages) for must-have smart robot pets for Christmas, keep these three technical factors in mind. They can make the difference between a gift that lasts years and one that ends up in the junk drawer by New Year's Day.
Battery Life and Charging
Nothing kills the holiday mood like a "low battery" warning 10 minutes after unboxing.
Self-Charging: For robots that roam the house (like the EBO X), "Self-Charging" is non-negotiable. The robot should know how to go back to its "house" to sleep.
Play Time: For handheld toys, look for at least 2 hours of continuous play per charge.
App Compatibility
Most top-rated AI robot pets require a smartphone app to unlock all their features.
Check the App Store or Google Play reviews before you buy. Is the app easy to use? Does it crash?
If you are giving the gift to someone who isn't "tech-savvy," make sure the robot can function without the app for basic play.
Sensors and Safety
A good robot should be "pet-proof."
Obstacle Avoidance: This prevents the robot from falling down stairs or getting stuck in a shag rug.
Non-Toxic Materials: Since there’s a good chance a dog might try to lick or "mouth" the robot, ensure the plastic and paint are pet-safe and BPA-free.
Conclusion: Giving the Gift of Connection and Joy
The 2025 holiday season is about more than just "things"—it’s about the connections we maintain. Whether it’s a Loona Robot Dog bringing a smile to a child's face, or an Enabot EBO X giving a working professional peace of mind, these robots are the bridge between our busy modern lives and our beloved animals.
Choosing from this list of top-rated AI robot pets ensures that you are giving a gift that is innovative, practical, and deeply emotional. As pet technology continues to advance, the line between "robot" and "companion" continues to blur, making this the perfect year to welcome a digital friend into the home.
Ready to find the perfect match? Don't wait until the last minute—high-demand items like the Moflin and Loona often have shipping lead times.

Why Your Next ‘Dog Sitter’ Might Just Be a Robot on Wheels
January 02, 2026
Your next dog sitter might be a robot on wheels because modern AI-driven mobile devices can now perform the three essential roles of a human sitter: interactive play, safety monitoring, and behavioral reinforcement. Unlike a static camera, a "sitter on wheels" can follow your pet from room to room, detect signs of distress through motion sensors and AI audio analysis, and dispense treats to reward calm behavior in real-time. This technology is trending because it provides a cost-effective, 24/7 alternative to professional pet sitters, offering owners total peace of mind through a mobile, digital presence in their own home.
The Shift from Human Sitters to Autonomous Guardians
For decades, the standard solution for a busy pet parent was simple: hire a neighbor or a professional sitter to "drop in." But as we move into 2025, the landscape of smart home pet care is shifting. The rising costs of professional services—often exceeding $30–$50 per hour—coupled with the inherent "Pet-Parent Guilt" of leaving a social animal alone for eight hours, has paved the way for a more consistent solution.
Enter the robotic pet sitter. This isn't just a gadget; it's an autonomous pet companion designed to bridge the gap between human intervention and passive monitoring. While a human sitter is limited by their schedule, an AI dog monitoring robot is available 24/7. It doesn’t just watch; it interacts, navigates, and learns. By 2025, these devices have evolved from simple "cameras on wheels" to sophisticated guardians that use AI behavior analysis for pets to ensure your furry friend is happy, healthy, and safe.
Mobility is Everything: Why Static Cameras are No Longer Enough
The primary limitation of traditional pet cameras, like the Furbo or Wyze, is their fixed perspective. If your dog decides to nap in the hallway or chew on a shoe behind the sofa, a wall-mounted camera is useless. This is why a mobile pet camera on wheels is a game-changer.
Eliminating the "Blind Spots"
Pets are experts at finding the one corner of the house that your camera can’t see. A robotic sitter uses mobility to eliminate these "blind spots." Whether your pet is hiding under the bed during a thunderstorm or lounging in a sunbeam in the guest room, the robot can seek them out.
The Psychology of Presence
From a pet's perspective, hearing a disembodied voice from a wall can actually increase anxiety. Research suggests that dogs respond more positively to a physical, moving entity. A robot that moves into the room creates a tangible presence, making the remote-controlled pet playmate feel like a real companion rather than a haunting voice.
Feature
Static Camera
Robotic Sitter (2025)
Field of View
Limited (Fixed)
360° (Mobile)
Interaction
Audio/Treats only
Physical Chase + Play
Pet Engagement
Passive
Active & Proactive
Room Access
Single Room
Multi-room Navigation
The AI Caretaker: Monitoring Health and Behavior in Real-Time
The "brain" of a 2025 robotic pet sitter is powered by advanced machine learning. It no longer just records video; it interprets life. Recent breakthroughs in AI behavior analysis for pets allow these robots to distinguish between a "playful woof" and a "distress bark."
Real-Time Barking Alerts and Beyond
Standard cameras send alerts for any loud noise. Modern AI robots use acoustic monitoring to provide real-time barking alerts that specify the type of bark. If the AI detects a "separation anxiety howl," it can automatically initiate a calming routine, such as playing soothing music or dispensing a treat.
Proactive Health Monitoring
According to a 2025 study published in Frontiers in Veterinary Science, AI models can now accurately predict signs of illness or distress by analyzing subtle shifts in posture and activity levels.
Pacing & Restlessness: The robot logs unusual movement patterns that might indicate a UTI or joint pain.
Destructive Behavior: If the robot detects the sound of tearing fabric or wood, it can intervene immediately with a "distraction command."
Interactive Play on Demand: Tossing Treats and Chasing Bots
One of the hardest parts of leaving a dog home alone is the lack of physical activity. A bored dog is often a destructive dog. This is where a remote-controlled pet playmate steps in to turn a lonely afternoon into an active one.
The "Chase and Reward" Cycle
Modern pet robots are programmed with "play AI." They don't just roll around aimlessly; they move in zig-zags and quick sprints to mimic the movement of small animals. This triggers a dog’s natural instinct to chase.
Treat-Tossing: Most models, like the Enabot EBO X or ORo, have a built-in "treat cannon." After a successful chase or on a set schedule, the robot can pop out a snack. This rewards your pet for staying active.
Laser Play for Cats: Many of these bots also include a pet-safe laser. You can control it from your phone or let the robot run a "laser dance" automatically to keep your cat jumping and pouncing.
Building a Routine
You can set a "play schedule" through an app. For example, your robot can wake up at 10:00 AM for a 10-minute chase session, then again at 2:00 PM. This breaks up the day and ensures your pet gets their steps in, even if you are stuck in meetings.
Safety First: Navigation Systems and Pet-Safe Engineering
The most common concern for pet owners is: "Will the robot run over my dog's tail?" In 2025, the answer is a definitive no, thanks to LiDAR obstacle avoidance.
LiDAR: The Eyes of the Robot
The secret to safe movement is LiDAR obstacle avoidance. This is the same technology used in self-driving cars. The robot sends out thousands of tiny laser pulses to create a 3D map of the room.
Tail Detection: High-end robots can "see" a sleeping pet and will give them a wide berth.
Cliff Sensors: You don't have to worry about the robot falling down the stairs. Sensors on the bottom detect "cliffs" and tell the robot to stop and turn around instantly.
Handling the "Rough" Stuff
Not every home has perfectly flat floors. Modern autonomous pet companions are built like mini off-roaders:
Thick Rugs: Large, rubber-treaded wheels allow the robot to climb onto thick shag rugs without getting stuck.
Tipping Protection: These robots have a low center of gravity. If a large dog playfully nudges it, the robot is designed to right itself or stay upright.
Silent Motors: To avoid scaring nervous pets, the motors are ultra-quiet—usually under 30dB, which is quieter than a whisper.
Cost-Benefit Analysis: Robot Investment vs. Daily Sitter Fees
Let’s look at the math. Professional pet sitting is a luxury that adds up fast. In 2025, the average cost for a single 30-minute "drop-in" visit is about $25 to $30.
The "Sitter Tax" Breakdown
If you work from an office five days a week, hiring a sitter for just one visit a day costs roughly $6,250 a year. Even if you only use a sitter twice a week, you are still spending over $2,500 annually.
The One-Time Investment
Most premium robotic pet sitters cost between $300 and $900.
Payback Period: A $600 robot pays for itself in just four to five weeks compared to a daily human sitter.
24/7 Availability: A human sitter leaves after 30 minutes. A robot stays in your home, providing 24-hour monitoring and real-time barking alerts.
Feature
Human Sitter (Per Year)
AI Pet Robot (One-Time)
Annual Cost
~$6,250 (Daily visits)
$300 - $900
Active Time
30-60 Minutes
24 Hours / 7 Days
Video Access
None (unless they send a photo)
Constant HD Live Stream
Long-Term Savings
None
Saves $5,000+ after year one
While a robot cannot take your dog for a walk outside, it provides the "gap coverage" that allows you to reduce human visits from once a day to once or twice a week, saving thousands of dollars.
Conclusion: Embracing the Future of Care-Free Pet Ownership
The "Electric Sitter" is no longer a concept of the far-off future; it is a practical, safe, and cost-effective reality for smart home pet care in 2025. By combining LiDAR obstacle avoidance, AI behavior analysis, and the fun of a remote-controlled pet playmate, these robots offer a level of consistency that human sitters simply cannot match for $30 an hour.
While they may not replace the warmth of a human cuddle, they are vastly superior for the 8-10 hours of daily monitoring most owners require. They ensure your pet is never truly alone, never bored, and always within your reach.
FAQ
How to keep my dog entertained while at work?
It's tough to keep your dog content during your workday. Boredom sets in quickly after their nap ends. That's when shoes or furniture often get chewed.
Try these easy tips to keep them busy:
Interactive Toys: Use food puzzles or a Kong filled with frozen treats. This gives your pet a "job" that keeps them focused for a long time.
Robot Playmates: An autonomous pet companion or a mobile pet camera on wheels can drive around the house to play tag with your dog or toss treats while you’re away.
Background Noise: Leave a radio on or put on "Dog TV." The human voices and animal sounds help reduce separation anxiety.
Window Access: If your dog likes watching the world go by, leave a curtain open so they can "patrol" the neighborhood.
Mixing a few of these methods ensures your dog stays mentally sharp and stays out of your shoe closet!
Can a robot dog-sit for me?
It won't walk your pet or clean up a mess. But it can work as a remote helper. Its main job is handling the hardest part of the day: keeping your dog company during those empty hours while you're at work.
What a Robot "Sitter" Can Actually Do?
Smart Patrol: Robots like the Rola Mini or ORo use LiDAR to move around your house. They do not just stay in one corner. Instead, they roam around to find your pet and check that they are safe and not trapped.
Behavioral Alerts: With AI analysis, the robot listens for specific noises. It sends instant alerts to your phone if it hears anxious howling or barking.
Fun Playtime: These robots act like a remote control toy for your dog. You can move the robot from your phone while at work. You can also speak through the speakers or toss a treat to say good job.

DIY Pet Tech: Can You Build Your Own Interactive Dog Robot?
January 02, 2026
You can absolutely build your own interactive dog robot. Use open-source hardware like Raspberry Pi or Arduino. Start with a simple treat dispenser or create an advanced walking robot. Your choice decides the challenge.
Entry-Level Projects: Start with the simplest DIY pet tech project. Repurpose an old RC car for basic movement. For a custom build, 3D print a frame and attach ultrasonic sensors. This lets it react to objects around it.
Advanced Builds: For experienced makers, open-source projects like the Stanford Pupper offer more realism. These Boston Dynamics-inspired designs provide lifelike motion and AI personalities. These builds require significant time for coding and mechanical assembly but offer the most professional results.
The Rise of the Homemade Robotic Companion
In an era where Boston Dynamics’ "Spot" and Sony’s "Aibo" dominate the headlines, the dream of owning a robotic companion has never been more tangible. However, with commercial prices for advanced models like the Unitree Go2 starting at $1,600 and Sony Aibo reaching nearly $2,900, many enthusiasts are turning to a more rewarding alternative: the "Build-It-Yourself" route.
Why build your own? The real reward is the engineering challenge. This project fits STEM students and weekend hobbyists alike. It's a creative playground. You'll build a machine you can program. It can learn to know your face, answer your voice, and explore its surroundings. This blog serves as your comprehensive roadmap, moving from the basic "hello world" of movement to the complex world of computer vision and bionic gaits.
Assessing the Difficulty Levels: From Treat-Tossers to Quadrupeds
Before ordering a box of servo motors for robotics, it is essential to identify which level of project matches your current skills. Building a robot that walks on four legs (a quadruped) is significantly harder than building one that rolls on wheels.
The DIY Difficulty Matrix
Level
Project Type
Core Components
Skills Required
Level 1
Stationary Hubs
ESP32, Camera, Stepper Motor
Basic Soldering, Simple Logic
Level 2
Wheeled Rovers
Arduino, Ultrasonic Sensors, DC Motors
Intermediate Coding (C++)
Level 3
Bionic Walkers
Raspberry Pi, 12+ Servos, IMU
Advanced Python, Kinematics
Level 1: The Interactive Hub: These aren't "dogs" in shape, but they act like pets. Think of a smart treat-tosser that uses computer vision for pets to detect when your dog is nearby.
Level 2: The Wheeled "Pup": By using a 3D printed robot dog chassis on wheels, you avoid the mathematical nightmare of balance (Inverse Kinematics). These are great for learning how to use ultrasonic sensors for pet interaction.
Level 3: True Quadruped DIY: This is the "Holy Grail." Robots like the Stanford Pupper or OpenCat utilize 8 to 12 degrees of freedom (DOF) to mimic animal movement.
The Essential Hardware Stack: Microcontrollers, Sensors, and Servos
The "anatomy" of a robot dog is divided into three main systems: the Brain, the Senses, and the Muscles.
The Brain: Raspberry Pi vs. Arduino vs. ESP32
Choosing your controller is the most critical decision.
Raspberry Pi Pet Robot: Best for Level 3 projects. It has the processing power to handle Python scripts for robot behavior and real-time video processing.
Arduino Dog Robot Kit: Perfect for Level 2. It is excellent for real-time hardware control but lacks the "grunt" for heavy AI tasks.
ESP32 Pet Tech Projects: A rising favorite because it includes built-in Wi-Fi and Bluetooth at a fraction of the cost, making it ideal for IoT-connected pet toys.
The Muscles: Servo Motors for Robotics
A quadruped requires at least two (and ideally three) servos per leg.
Standard Servos (SG90): Cheap and accessible but often lack the torque to lift a 3D-printed body.
High-Torque Servos (MG996R): The industry standard for DIY builds, offering the strength needed for a stable quadruped robot DIY.
The Senses: Interaction Hardware
To make your robot "interactive," it needs to perceive its environment:
Ultrasonic Sensors: These act as the robot's "whiskers," preventing it from bumping into walls.
IMU (Inertial Measurement Unit): Essential for Level 3 robots to maintain balance while walking.
Cameras: Often paired with a Raspberry Pi to enable facial recognition or ball-tracking.
Software and Coding: Giving Your Robot a Digital Soul
Hardware without software is just an expensive paperweight. Coding is where you define the "Interaction Loop": Sense → Think → Act.
Behavior Scripting with Python
Most modern DIY projects rely on GitHub robotic pet repositories that use Python. Python is favored because of its extensive libraries for AI and hardware interfacing. A simple "Excited" behavior script might look like this in pseudo-code:
if camera.detects_face(owner):
tail_servo.move_fast(wag)
speaker.play("bark.mp3")
legs.perform_dance()
The Challenge of Inverse Kinematics (IK)
In a quadruped robot DIY, you don't just tell a leg to move; you have to calculate the exact angle of every joint to keep the foot on the ground. This requires $$Inverse Kinematic$$ (IK) formulas.
For a 2-joint leg, the position of the foot $$(x, y$$ relative to the shoulder $$(0,0$$ with leg lengths $$L_$$ and $$L_$$ can be found using:
$$\theta_2 = \arccos\left(\frac{x^2 + y^2 - L_1^2 - L_2^2}{2L_1L_2}\right)$$
Fortunately, many open-source projects provide these "math kernels" so you don't have to start from scratch.
Open-Source Blueprints: The Best Communities for DIY Pet Tech
If you are just starting out, the best way to succeed is to follow an existing blueprint. These "open-source" projects provide everything you need: 3D printing files (STL), lists of parts to buy, and the code to make it walk.
Quick overview:
Feature
Stanford Pupper (v2/v3)
OpenCat (Petoi Bittle)
SpotMicro
Designer
Stanford Student Robotics
Petoi (Rongen Merrill)
Deok-Yeon Kim (Community)
Complexity
High (12 DOF): Complex math and assembly.
Medium (9 DOF): Accessible and palm-sized.
Medium/High (12 DOF): Large scale, high customization.
Primary Controller
Raspberry Pi 4B / Pi 5
Arduino Uno (NyBoard) / ESP32
Raspberry Pi 3B / Jetson Nano
Cost to Build
$800 – $2,000: Higher cost for specialized motors.
$200 – $350: Very affordable entry point.
$300 – $600: Depends on servo choice and sensors.
Best For
Academic Research & High-Agility Testing.
STEM Learning, Beginners, and Coding Fun.
Hobbyist Makers & Boston Dynamics Fans.
Chassis Material
Carbon Fiber or High-Precision 3D Print.
Plastic Injection (Kit) or 3D Printed.
Fully 3D Printed (Requires large print bed).
Software Focus
Python, ROS, and AI Agility.
C++, Python, and Block-based coding.
ROS (Robot Operating System) & Python.
Movement Style
Dynamic: Hopping, trotting, and running.
Bionic: Lifelike tricks and nimble walking.
Steady: Stable walking, sitting, and stalking.
The Stanford Pupper: The Academic Gold Standard
Created by the Stanford Student Robotics club, the Stanford Pupper is a high-performance quadruped. It’s designed for people who want to explore serious AI and machine learning.
Best For: Students and researchers who want a robot that can trot, jump, and run.
The Hardware: It uses high-torque servo motors for robotics and a Raspberry Pi pet robot "brain."
The Community: You can find the full assembly guide and GitHub robotic pet repositories easily. There is a very active Discord community where experts help beginners troubleshoot their code.
OpenCat (Petoi Bittle): The Best for Hobbyists
OpenCat is a framework that powers robots like the "Bittle" (a small dog) and "Nybble" (a cat). It’s incredibly popular because it is designed to be small and affordable.
Best For: Hobbyists who want a "smart" pet without spending thousands of dollars.
The Hardware: It often uses an Arduino dog robot kit or an ESP32 pet tech project board. It has 9 degrees of freedom (DOF), allowing it to perform lifelike tricks like sitting, stretching, and rolling over.
The Community: Their "Petoi Camp" forum is a goldmine for Python scripts for robot behavior.
SpotMicro: The "Mini-Spot" Tribute
If you love the look of the famous Boston Dynamics "Spot" robot, SpotMicro is the project for you. This is a community-driven project that focuses on recreating that iconic look using a 3D printed robot dog chassis.
Best For: Makers who love 3D printing and customizing their robot’s appearance.
The Hardware: Most builds use servo motors like the MG996R and an ultrasonic sensor for pet interaction to avoid walls.
The Community: Files are shared widely on Thingiverse and GitHub. Because it’s community-made, there are dozens of different "remixes" you can choose from.
Safety and Durability: Making Your Build Pet-Proof
When you build your own robot dog, you have to remember that it will likely interact with real animals. Real dogs are curious, energetic, and sometimes a little bit "toothy." If you don't build it right, your hard work could be destroyed in seconds.
Choosing Pet-Safe Materials
Not all 3D printing plastics are created equal.
Avoid PLA: While it's the easiest to print, PLA is very brittle. If a real dog bites it, the plastic can shatter into sharp, dangerous shards.
Use PETG or TPU: PETG is much tougher and more impact-resistant. TPU is a flexible, rubber-like material that is perfect for the "feet" of the robot to give it grip and prevent scratching your floors.
Non-Toxic Filaments: Always look for "non-toxic" filaments. Since your pet might lick or nudge the robot, you want to be sure no harmful chemicals are on the surface.
Ruggedizing the Electronics
Your robot’s "innards" are its most vulnerable part. One drop of dog drool or a snagged wire can cause a short circuit.
Cable Management: Use braided cable sleeves or "spiral wraps" to protect wires. This prevents a curious cat or dog from chewing through your servo motor connections.
Hot Glue is Your Friend: Use a dab of hot glue on the spots where wires connect to the board. This prevents them from vibrating loose while the robot walks.
Enclosed Chassis: Never leave the Raspberry Pi or Arduino exposed. Always print a solid cover to keep fur and moisture out of the electronics.
Battery Safety: The Most Important Step
Most DIY robots use Lithium Polymer (LiPo) batteries. These are great because they are light and powerful, but they can be dangerous if they are punctured.
Hard-Shell Cases: Always house your battery in the most protected part of the 3D printed robot dog chassis.
Voltage Alarms: Use a small LiPo alarm. It will beep loudly if the battery gets too low, which prevents the battery from becoming unstable.
Supervision: Never leave your DIY robot alone with your real pets. Always be there to step in if the play gets too rough.
Conclusion: The Reward of Creating Your Own Tech-Pet
Building an interactive dog robot is a journey through the most exciting fields of modern technology: 3D printing, embedded electronics, and AI. While a Raspberry Pi pet robot might not have the soft fur of a Golden Retriever, the "bond" created through hours of troubleshooting and coding is unique.
Right now is the best time to start. GitHub is full of open-source pet robot designs. High-torque servo motors are also very affordable. With a laptop and a 3D printer, you can begin. You're creating more than a machine; you're starting a foundation for what comes next.

Privacy Concerns: What You Need to Know About Your Pet Robot’s Camera
January 02, 2026
Safeguarding your privacy with a pet robot starts with a simple truth: these gadgets are roving cameras. They capture private details of your home life, including video, sound, and floor plans. While these tools help you check on your pets, they also create real security gaps. Hackers can gain remote access, cloud servers can leak, and some companies might share your personal data with third parties.
To keep your living space private, look for specific security features. Choose robots that offer end-to-end encryption and physical covers for the camera lens. It is also wise to pick models with local storage. This keeps your private videos on the device itself instead of sending them to a public cloud server.
The Eyes and Ears of the Modern Smart Home
Over the past ten years, our homes have changed from simple houses into busy digital hubs. Many people now use pet robots to bridge the gap while they are away. These small machines can move around to play with, feed, or watch over pets through a mobile app. They use high-quality cameras and wheels to stay connected to your animals at all times. This tech provides great benefits, but it also brings up a major worry. We have to stop and think: what happens to our privacy when a rolling camera can see into every corner of our house?
Most owners do not fear the robot itself. Instead, they worry about what it represents: a moving, online gateway into their private lives. A standard baby monitor stays in one spot. However, a pet robot can roll around corners and enter bedrooms. It can even map out the entire layout of your home. This section explores the "Security vs. Convenience" trade-off. We want the peace of mind that comes with seeing our dog is safe, but we don't want to compromise our own smart camera security for pets.
As we invite these "eyes and ears" into our homes, understanding the technical landscape of IoT security for home robots becomes not just a hobbyist's interest, but a fundamental necessity for digital safety.
Data Collection 101: What Does Your Pet Robot Actually See?
To understand the privacy implications, we must first demystify the "vision" of a modern pet robot. It isn't just a simple video stream. Modern AI-driven companions utilize a suite of sensors to navigate and interact.
Types of Data Collected by Pet Robots
Sensor Type
Data Captured
Privacy Implication
HD Video Camera
Visual footage of pets, residents, and decor.
High: Potential for voyeurism if hacked.
Microphone Array
Audio of barks, conversations, and glass breaking.
High: Can record private conversations.
LiDAR / SLAM
3D mapping of the home’s layout and dimensions.
Medium: Creates a "digital twin" of your floor plan.
Facial Recognition
Identification of specific humans and pets.
High: Biometric data collection.
Infrared (IR)
Night vision capabilities.
Medium: Allows monitoring in total darkness.
The Digital Floor Plan
Most high-end pet robots use LiDAR or SLAM to keep from hitting your chairs and tables. That's great for moving around, but it means the company’s servers could be holding a super-detailed, inch-by-inch map of your home. If they don't use end-to-end encryption for cloud storage, a single leak could be a nightmare. It would basically hand a stranger a blueprint of your house, showing them exactly where your doors, windows, and expensive stuff are located.
AI "Listening" and Analytics
It’s not just about what the robot sees; it’s about what it interprets. Many pet robots use edge computing to detect specific "events." If your robot picks up a smoke alarm or hears a stranger, it pings your phone. That is handy, but it means the mic is always listening or recording small bits of audio. This makes people wonder who actually hears those sound files. Often, staff or researchers listen to these clips to teach the AI how to work better.
Vulnerabilities and Hacking: The Risk of Unauthorized Remote Access
Lots of pet owners ask a simple question: "Can someone hack my pet camera?" Honestly, the camera is only as safe as the tech behind it. Since these toys stay online, they are part of the "Internet of Things." That just means they are big targets for hackers or automated bot networks looking for a way in.
Common Security Weak Spots
Weak Factory Passwords: A lot of cheap pet robots come with basic passwords like "admin" or "1234." If you do not swap these out right away, almost anyone can get into your device. It basically leaves your camera wide open for the whole world to see.
Unencrypted Firmware Updates: If firmware update security is neglected, hackers can intercept the update process and inject malicious code into the robot, giving them permanent "root" access to the camera and movements.
P2P Connection Risks: Many apps use Peer-to-Peer (P2P) protocols to let you see your pet quickly without lag. However, some poorly implemented P2P servers have been found to have "ID-guessing" vulnerabilities, allowing strangers to cycle through camera IDs until they find a live feed.
Outdated Software: According to a 2023 report by Which?, many "smart" home devices lose manufacturer support within just two years, leaving them vulnerable to new exploits that will never be patched.
Expert Note: A compromised pet robot is more dangerous than a compromised stationary camera. A hacker can drive a pet robot into a bedroom or bathroom, areas where you might not normally have a fixed camera installed.
Cloud vs. Local Storage: Understanding Where Your Footage Lives
A major fork in the road for privacy is how the robot handles the data it records. Most consumers don't realize that "Cloud Storage" means your private videos are sitting on a server owned by Amazon, Google, or a third-party startup.
Cloud Storage: The Convenience Trap
Pros: Easy to access from anywhere; footage is safe even if the robot is stolen or broken.
Cons: Vulnerable to server-side breaches; employees of the company may have "super-admin" access to view clips for "quality assurance."
Privacy Tip: Always check if the provider uses end-to-end encryption (E2EE). This ensures that only your phone holds the "key" to unlock the video, making it unreadable even to the company hosting it.
Local Storage: The Privacy Fortress
Pros: Data stays on an SD card inside the robot or a private Network Attached Storage (NAS) device. No monthly subscription fees.
Cons: If the robot is stolen, the footage goes with it; requires more technical setup.
Reading the "Terms of Service" (ToS)
Many privacy-focused pet robots will explicitly state they do not sell your data. However, budget brands often include clauses in their ToS that allow them to share "anonymized" metadata with partners. As reported by Consumer Reports, "anonymized" data can often be re-identified when combined with other data sets, potentially linking your home habits to your advertising profile.
The Privacy Checklist: Must-Have Security Features Before You Buy
When shopping for a pet robot, look for these specific features to ensure you aren't bringing a Trojan horse into your home. Use this checklist as your "Gold Standard" for smart camera security for pets.
The "Must-Haves"
Physical Privacy Shutter: A mechanical cover that slides over the lens. Unlike a software "off" button, you can visually confirm the camera is blind.
Two-Step Login: This is a total must-have for your pet app. Every time you log in, it pings a code to your phone or your email. It’s a great safety net because even if a hacker figures out your password, they still won't be able to get into your account.
Recording Light: Look for a bright LED light on the camera. It should only light up when the camera is actually watching or recording. This lets you know at a glance when you are being filmed.
Local Data Handling: Try to find robots that do their "thinking" right on the device. Instead of sending your private video to a company’s cloud for the AI to analyze, it keeps the footage inside your own home.
"Privacy Mode" Schedule: The ability to set "No-Go" zones or "Off" hours when the robot parks itself and faces a wall while you are home.
Proactive Defense: How to Secure Your Pet Robot Today
If you already own a pet robot, or you've just unboxed one, follow these steps to harden your IoT security for home robots.
Secure Your Home Network
Don't connect your robot to your main Wi-Fi network. Most modern routers allow you to create a "Guest Network." Connect all your IoT devices (robots, smart bulbs, plugs) to this isolated network. If a hacker breaches the robot, they won't have a direct path to your laptop or personal phone where you store bank details.
Audit App Permissions
On your smartphone, check what permissions the pet robot app has. Does it really need access to your "Contacts" or "Precise Location" at all times? Limit permissions to the bare minimum required for the device to function.
Frequent Firmware Updates
Firmware update security is your primary defense against evolving threats. Check the app weekly for updates. Manufacturers release these to "patch" security holes that hackers have discovered.
Change the "Wake Word" and Password
Try changing your robot's "wake word" or just lowering the microphone's sensitivity if it is able to respond. Most importantly, give the robot its own strong password. Don’t just reuse the same one you have for your email or Facebook—keep it separate so a single leak doesn't ruin everything.
Conclusion: Balancing Peace of Mind with Digital Safety
The emergence of pet robots is a testament to how much we value our animal companions. Being able to check in on a lonely dog or play laser tag with a cat from three states away is a technological marvel. However, this joy should not come at the expense of your fundamental right to privacy.
By choosing privacy-focused pet robots that prioritize local storage, end-to-end encryption (E2EE), and two-factor authentication (2FA), you can mitigate the vast majority of risks. A pet robot should be a member of the household that brings joy, not a source of surveillance anxiety.
Take Action Today: Open your pet robot’s app right now. Check if 2FA is enabled and see if there are any pending firmware updates. Your "Private Life" deserves that five-minute investment.

Tech-Savvy Training: Using Robots to Reinforce Positive Pet Behavior
January 02, 2026
Training your pet with robots is a smart new way to use tech for better behavior. These systems use AI to give your pet a reward or a "good dog" the very second they do something right. Unlike us, a robot doesn't get tired and can watch your pet all day and night. Because its timing is so perfect, your pet learns much faster. This makes life way easier for busy owners, as the robot provides the steady routine pets need to learn tricky commands or stay calm.
The Automation Revolution in Canine and Feline Training
For decades, the "gold standard" of pet obedience has relied on a simple analog tool: the mechanical clicker. The premise was sound—mark the behavior instantly, then reward. However, this method relies entirely on a variable that is notoriously unreliable: human reaction time.
We are now witnessing a paradigm shift from manual conditioning to the era of automated pet training. In a world where smart homes manage our lighting and security, AI dog training devices and feline smart systems are emerging as the new frontier in animal behaviorism. This isn't about replacing the bond between owner and pet; it is about augmenting it with data-driven consistency.
The modern pet owner faces a unique dilemma: they want a well-behaved companion, but work schedules and social obligations often leave "training gaps." A dog may bark incessantly while the owner is at work, or a cat may scratch furniture when unsupervised. This is where positive reinforcement robots step in. By utilizing sensors that never sleep and dispensers that never tire, these devices ensure that the "reward window" is never missed.
This article explores how integrating smart reward systems for pets into your daily routine can accelerate learning, reduce anxiety, and create a harmonious household through the power of Tech-Savvy Training.
The Science of Timing: Why Robots Outperform Humans in Precision
To understand why robots are becoming superior training assistants, we must look at the psychological principle of Contiguity in Operant Conditioning.
The 1-Second Rule
In animal behavior science, the effectiveness of a reward drops precipitously if it is delayed. Research suggests that for a dog to clearly associate an action (like sitting) with a consequence (a treat), the reward must be delivered within 1 to 2 seconds.
The Human Flaw: By the time a human notices the dog sitting, reaches for the treat bag, fumbles with the zipper, and hands over the kibble, 3 to 5 seconds may have passed. The dog might have already stood up or looked away, confusing the association.
The Robotic Solution: Precision reward timing is the core advantage of automation. A robot equipped with computer vision or motion sensors detects the "sit" state and fires a treat in milliseconds.
Consistency Over Emotion
Humans are emotional trainers. We might skip a reward because we are tired, or reward a bad behavior because "he looks so cute." Operant conditioning in pet tech removes this bias. A robot offers a "Fixed Ratio" or "Variable Ratio" reinforcement schedule exactly as programmed.
Comparison: Human vs. Automated Training
Feature
Human Trainer
Positive Reinforcement Robot
Latency (Time to Reward)
2–6 Seconds (Variable)
< 0.5 Seconds (Fixed)
Consistency
Affected by mood/fatigue
100% Consistent
Availability
Limited (1–2 hours/day)
24/7 Monitoring
Bias
Prone to emotional drift
Purely data-driven
By removing the "human lag," clicker training automation clarifies the learning process for the animal, leading to faster acquisition of new behaviors.
Smart Treat Dispensers: The Front Line of Remote Reinforcement
The most accessible entry point into this technology is the smart treat dispenser. However, modern iterations have evolved far beyond simple remote-controlled candy jars; they are now sophisticated remote behavior reinforcement hubs.
Combating Separation Anxiety
Post-pandemic statistics have shown a startling rise in separation anxiety among pets. A 2022 study highlighted that anxiety issues in dogs jumped significantly as owners returned to offices. Smart dispensers bridge this gap.
Mechanism: These devices allow owners to observe their pets via HD cameras and dispense treats via a smartphone app.
Application: You can reinforce "calm states." If you check the camera and see your dog lying quietly rather than pacing, you trigger a treat. This teaches the dog that independence pays off.
Bark Detection Technology
Excessive vocalization is one of the top reasons for neighbor complaints. Advanced dispensers now feature bark detection technology.
The Trigger: The device's AI audio sensor detects a period of silence following a barking event.
The Reward: It automatically dispenses a treat only when the room has been quiet for a set duration (e.g., 30 seconds).
The Result: The dog learns that silence, not noise, generates the reward.
Note on Efficacy: A study on remote-controlled positive reinforcement systems demonstrated that automated protocols could reduce barking frequency from over 19 barks/minute to roughly 2 barks/minute. This proves that remote behavior reinforcement works even when the human is not physically present to command "Quiet."
Interactive Movement Robots: Training Through Physical Play
While treat dispensers handle calmness, what about the high-drive dog that destroys the couch out of boredom? Robots for high-energy dogs are designed to channel predatory instincts into healthy play.
From Prey Drive to Play Drive
Terriers, Shepherds, and Pointers have genetic needs to chase and capture. Interactive movement robots—often shaped like bones or small balls—move autonomously around the floor.
Cognitive Stimulation for Dogs: Unlike a static chew toy, these robots react. If the dog chases, the robot flees. If the dog stops, the robot teases. This mimics the unpredictability of live prey, providing deep mental enrichment.
Automated Agility: Some advanced units can be programmed to run specific patterns (Figure-8s, circles), effectively acting as an automated agility course.
Fighting the Obesity Epidemic
With the Association for Pet Obesity Prevention (APOP) reporting that nearly 60% of dogs and cats in the U.S. are overweight or obese, passive lifestyles are a killer.
The "Follow Me" Protocol: AI dog training devices can be set to "fitness mode," requiring the pet to chase the device for 10 minutes to unlock a small portion of their daily food intake. This forces movement and turns mealtime into an engaging sport.
Data-Driven Insights: Tracking Behavioral Milestones via App Integration
Perhaps the most "tech-savvy" aspect of this new wave of training is the data it generates. In the past, progress was measured by "feeling"—“I think Fido is barking less.” Now, interactive pet training apps provide hard evidence.
The Quantified Pet
When connected to smart collars or dispenser logs, these apps track pet behavior data.
Success Rate Analytics: You can view a graph showing how many times your dog complied with a "sit" command given by the automated system.
Bark Logs: Instead of guessing if your dog was anxious while you were out, the app provides a timeline: “Barking detected at 10:00 AM (Duration: 2 mins). Quiet reward dispensed at 10:05 AM.”
Adjusting the Strategy
This data allows for scientific adjustments to your training plan.
Scenario: The data shows your dog ignores the robot between 2 PM and 4 PM.
Insight: This might be their deep sleep cycle, or perhaps the sun glare hits the device sensors.
Action: You adjust the training schedule to morning hours when engagement is higher.
By relying on data-driven insights, owners stop wasting time on ineffective sessions and focus on what the numbers prove is working.
Balancing Tech and Touch: Integrating Robots into a Human-Led Program
Despite the efficiency of AI behavior reinforcement, a robot cannot replace the emotional bond between you and your pet. Robots are tools for drills; humans are for relationship.
The Hybrid Training Model
To successfully implement Tech-Savvy Training, follow this division of labor:
Use Robots for Repetition:
The "Drill Sergeant" Role: Use the machine to teach the mechanics of "Sit," "Down," or "Place." The robot does not get bored repeating the same command 50 times; you do.
Desensitization: Use automated sounds and rewards to get a pet used to doorbells or thunder sounds at low volumes.
Use Humans for High-Value Praise:
The "Pack Leader" Role: Once the dog knows the mechanics, you must step in. A robot can dispense a treat, but it cannot offer a belly rub, a warm enthusiastic "Good boy!", or a walk.
Generalization: A dog may learn to obey the robot but ignore the owner. You must "transfer" the command by practicing what the robot taught, ensuring the dog listens to you as well as the machine.
Pro Tip: Never use a robot to "babysit" a distressed animal for days on end. Smart reward systems for pets are supplements to good husbandry, not substitutes for presence.
Conclusion: Creating a Modern Harmony Through Robotic Assistance
The concept of "Tech-Savvy Training" is no longer science fiction; it is a practical reality for modern pet owners. By leveraging automated pet training and positive reinforcement robots, we can bridge the gap between our busy lives and our pets' biological needs.
These devices offer the precision reward timing that biology often fails to provide, and they offer the cognitive stimulation required to keep high-energy breeds sane in urban environments. As we move forward, the most successful owners will be those who view these robots not as gadgets, but as partners—tireless assistants dedicated to helping every pet become "the goodest dog" they can be.
FAQ
How to train a dog while at work?
While you're out at work, training your dog is easy. All you have to do is set things up right before you leave. Grab some smart toys: Put a puzzle toy in the freezer with peanut butter before you leave. This gives them a real job to do. It keeps their brain busy so they aren't looking for shoes to chew on.
Use a little tech: Think about getting a pet camera that can toss treats. Check the app during your lunch break. If your dog is just chilling out, hit the button for a reward. It shows them that being calm is a "good job."
These tiny habits keep the training going, even when you aren't there to see it!
Can robots help with pet separation anxiety?
Robot helpers are a game changer if your pet hates being alone. Modern reward-based robots don't just watch from the corner; they actually jump in and play. For instance, some smart bots can "hear" a dog's bark or whine. They respond right away by tossing a snack or playing soft music to help them settle down.

The No-Allergy Solution: Why Robot Pets are Trending in Modern Apartments
January 02, 2026
Robot pets are trending in modern apartments as the ultimate "no-allergy solution" because they provide the psychological benefits of companionship—such as reduced stress and tactile comfort—without the dander, fur, or odors that trigger respiratory issues. For urban dwellers living in confined spaces, robotic pets eliminate the conflict between pet ownership and health, offering a 100% hypoallergenic alternative that requires no walks, no litter boxes, and complies with even the strictest "no-pet" building policies.
Breaking the Allergy Wall in City Life
Many animal lovers cannot simply hug a pup or pet a cat. For these folks, it is a treat they simply cannot enjoy. People with allergies are very used to this struggle. You go to a buddy's house and your eyes get red and watery fast. You soon have breathing difficulties and an itchy throat. This is the "allergy barrier." It acts like a wall that stops millions of people from feeling the joy of owning a pet.
This gap leads to a real case of "Pet-Owner FOMO." It seems like everyone has a service dog or hangs out at cat cafes lately. If you have bad allergies, you probably feel left behind. Watching others enjoy things you cannot is difficult. But the situation is finally starting to shift for the better. A quiet shift is happening right now in the world of smart apartments.
We are no longer discussing those cheap, noisy plastic toys from the 1990s. The era of AI pet companions has finally here. These new machines are smart and can react to how you feel. They are built to give you the same comfort and love as a real living animal.
As urban living spaces shrink and health consciousness rises, hypoallergenic pet alternatives are moving from novelty items to essential lifestyle technology. This article serves as a comprehensive guide for the modern apartment dweller who wants a "heartbeat" in their home without the sneeze, exploring how robot pets for allergy sufferers are redefining companionship.
The Science of Dander: Why Traditional Pets Fail Apartment Dwellers
To understand why robotic alternatives are surging in popularity, we must first understand the biological mechanism of the problem. A lot of folks think that getting a hairless cat or a Doodle dog is the perfect fix for allergies. But science shows that this is usually a mistake. It can even be a dangerous way to look at things.
The Myth of the "Hypoallergenic" Biological Pet
The Asthma and Allergy Foundation of America says there is no such thing as a truly "hypoallergenic" pet. The fur is not what causes the reaction. Instead, it comes from a protein in the animal's spit, pee, and dead skin cells.
Check this out: Cats have a protein called Fel d 1 that causes most allergies. It may linger in the air for hours since it is so tiny and sticky. That protein still remains on the skin of a hairless Sphynx.
The Apartment Ventilation Trap
The issue is exacerbated by modern apartment architecture. To maximize energy efficiency, modern "smart apartments" are often sealed tightly to retain heat or cool air. While this is excellent for utility bills, it is disastrous for allergy sufferers attempting to live with a pet.
Recycled Air: Apartment vents usually just move the same air around. This keeps allergens inside the room instead of blowing them outside.
Soft Surfaces: Small homes have rugs and curtains very close to you. Pet dander gets stuck deep in these fabrics and is super hard to clean out.
No Room to Hide: In a small studio, you can't have a "pet-free" area. Since the rooms are all connected, you end up sleeping right where the allergens are thickest.
The only choice that is safe for those with allergies is a robot pet because of these factors. A robot doesn't have proteins, skin cells, or spit. It gets rid of all health risks while still giving you a friend to keep you company.
Sensory Comfort Without the Sneeze: The Tech Behind the Fur
Most people doubt robot pets for one simple reason: Can a piece of tech really be a friend? The truth is found in how fast new materials and touch tech are growing. Makers aren't just making robots that walk or crawl anymore. They are making robots that feel real when you touch them.
Synthetic Fur Pet Robots
Early robotic pets were made of hard plastic. Today’s synthetic fur pet robots utilize high-grade, hypoallergenic synthetic fibers designed to mimic the texture of biological fur.
Texture Mapping: Engineers use varying lengths of synthetic fibers—shorter on the nose, longer on the body—to replicate the tactile experience of stroking a real animal.
Sanitization: Unlike biological fur which traps pollen and dust mites, high-quality synthetic fur can be wiped down or removed and washed, ensuring a sterile environment.
Realistic Purr Technology and Haptics
The emotional bond with a pet is largely built on feedback. When you pet a cat, it purrs. When you hug a dog, you feel its warmth and heartbeat.
Realistic purr technology has become a staple in high-end models. Using specialized vibration motors (haptics), these robots create a low-frequency rumble that mimics the "purr box" of a feline.
The "VibraPurr" Effect: This isn't just a noise you hear. It is a feeling you can actually touch. When you put the robot on your lap, the shaking hits your nerves. This can help lower your blood pressure and release oxytocin. That is the same "feel-good" chemical you get when you bond with a real person or a pet.
Simulated Heartbeats: Some therapeutic models, initially designed for dementia care but now popular in apartments, feature a rhythmic "heartbeat" mechanism inside the chassis. This provides a subconscious signal of life and presence.
Smart Tech and Reactions
New robot pets use special touch sensors hidden under their fur. These sensors can tell the difference between a quick tap, a scratch, or a long stroke.
AI Learning: The smartest models actually learn what you like. If you scratch its ears a lot, the robot will start to lean into your hand. This creates a special bond that feels just like a real pet.
Modern Apartment Constraints: Why Robots Outperform Living Pets
Beyond the allergy benefits, the lifestyle of the modern urban professional is increasingly hostile to biological pet ownership. Smart apartment pet ideas often focus on maximizing limited space and navigating strict rental rules.
The Logistics of Urban Living
Apartment living comes with unique constraints that robotic pets effortlessly bypass.
Constraint
Biological Pet Challenge
Robotic Pet Solution
Space
Large dogs need yards; cats need litter box space and climbing trees.
Compact design; requires no dedicated floor space or furniture.
Lease Rules
"No Pet" clauses, weight limits, breed restrictions, and pet deposits ($500+).
Categorized as electronics, not livestock. Exempt from all pet bans and fees.
Work Schedule
Requires walking, feeding schedules, and suffers separation anxiety.
"On/Off" convenience. Can be powered down during work trips or long shifts.
Noise
Barking or meowing can lead to noise complaints from neighbors.
Volume control or mute options ensure total silence during quiet hours.
The "On-Demand" Friend
If you're a busy consultant or a nurse with long, random shifts, leaving a dog in a tiny apartment feels awful. You just feel so guilty about it. Having a high-tech pet that needs zero care totally fixes that feeling. You get the fun without the stress of leaving a living creature alone all day.
Robot pets don't ever get lonely. They won't rip up your couch because they’re bored, either. They just sit on their charger and wait for you to come home. This lets you have a buddy on your own terms. You get the fun of a pet without all the chores that usually mess with a busy city life.
Top Robot Pets for Tight Spaces
Not every robot is worth the hype. I’ve looked at the top options on the market to see which ones actually feel real, work well in small apartments, and—most importantly—won't trigger your allergies.
The Joy for All Companion Cat (Ageless Innovation)
Best For: Seniors and those seeking pure tactile comfort.
Key Features:
VibraPurr Technology: Offers a deeply resonant purr that feels incredibly real.
Motion Sensors: Reacts to movement nearby by opening eyes or mewing.
Maintenance: Runs on C-batteries; synthetic fur is easy to brush.
Analysis: This is the gold standard for a first robot pet. It may roll over for belly rubs and pretend to groom itself, but it can't move. These lifelike moves make it a great buddy to keep on your lap.
Loona (KEYi Tech)
Best For: Tech enthusiasts and smart home integration.
Key Features:
AI Personality: Loona recognizes your face and follows you around. She always knows who you are.
Mobility: She has wheels instead of legs. This makes her super quick on the hard floors found in most apartments.
Expression: Her digital face shows many different feelings. You can always tell what she is "thinking."
Analysis: Loona represents the peak of artificial intelligence pet companions. She plays fetch, investigates new objects, and even "dances." She bridges the gap between a pet and a smart home assistant.
PARO Therapeutic Seal
Best For: Therapeutic use and high-anxiety relief.
Key Features:
Bio-Feedback: PARO is an FDA-listed biofeedback device. It has tactile sensors, posture sensors, and audio sensors.
Antibacterial Fur: Specifically designed for hospitals, making it the ultimate dander-free companion.
Learning: Adapts its behavior based on how it is treated, e.g., will stop doing things you don't like.
Analysis: While expensive (often $6,000+), PARO is the most scientifically validated robot for reducing stress. Its seal form factor was chosen to avoid the "uncanny valley"—since most people haven't held a real seal, they accept PARO as real more easily than a robot dog.
Tombot Jennie
Best For: Realistic dog lovers.
Key Features:
Animatronics: Designed by Jim Henson’s Creature Shop (the makers of the Muppets), ensuring hyper-realistic movement.
Emotional Support: Specifically coded to simulate the demeanor of a Golden Retriever.
Analysis: For those who miss the specific look and feel of a dog, Tombot offers the closest visual approximation without the allergens.
Beyond Allergies: The Unexpected Benefits of a Maintenance-Free Pet
While the primary driver for these devices is often health-related, owners are discovering secondary benefits that make pet-free companionship superior in many ways to biological ownership.
Financial Freedom
The cost of owning a dog or cat has skyrocketed.
Biological Pet: According to the ASPCA, the first-year cost of a medium dog exceeds $3,000, with lifetime costs ranging from $15,000 to $20,000 (food, vet bills, insurance, grooming).
Robotic Pet: A one-time investment ranging from $130 (Joy for All) to $3,000 (Aibo/Tombot). There are no food costs, no vaccinations, and no boarding fees during vacations.
The "Clean Home" Aesthetic
Modern apartment decor often favors minimalism—clean lines, light fabrics, and open spaces. Real pets are agents of chaos in these environments.
Zero Odor: Zero-maintenance pet tech means no "wet dog" smell and no litter box ammonia triggering headaches.
Furniture Preservation: No claw marks on the leather sofa and no urine stains on the rug.
Pest Control: Biological pets often introduce fleas or ticks into the home; robotic pets remain sterile.
Mental Health and Consistency
Studies involving the PARO seal have shown that interaction with robotic pets can lower cortisol (stress) levels and improve mood, much like a real animal. However, the robot offers consistency. A robot never has a "bad day," never snaps at the owner, and is always available for a cuddle. For individuals with anxiety or PTSD, this predictable, safe interaction is a massive advantage.
Conclusion: Redefining the Future of Domestic Companionship
Choosing a robot pet isn't just a quick fad for people with allergies. It is a major shift in how we think about having a pet at home. As our houses get smarter and our schedules get busier, more people need a friend that fits their health and their life. This kind of companion is only going to become more popular.
People are finally letting go of the idea that a pet needs a heartbeat to count. If a companion helps you destress, makes you happy after a hard day, and keeps you company when you're lonely, it’s doing exactly what it should. It really doesn't matter if it eats food or just needs to be charged up.
If you’ve spent years wishing you could have a pet from the store window, your wait is finally done. Tech has finally caught up to what your heart needs. You can now enjoy a wagging tail, a soft purr, and a loving look without sneezing even once.

Living with Robots: A Day in the Life of a High-Tech Pet Household
January 02, 2026
Living in a high-tech pet home changes your role. You stop being a "pet owner" and become a "smart home manager." Automation takes over the boring daily chores. This lets you focus entirely on bonding with your pet.
In this lifestyle, AI robots keep your pet busy and happy all day long. Automated tools handle the cleaning to keep the home fresh. Smart sensors even track health and spot issues before they get serious. This setup stops "pet-parent burnout" for good. It uses technology to create a calm, easy life for both you and your animals.
The Rise of the Smart Pet Home
What we call a "pet-friendly home" looks very different now. Just a few years ago, smart tech was pretty basic. You might have owned a simple Wi-Fi camera or a bowl that opened on a timer. Today, things have moved much further. By 2025, we have entered a new stage where full robotic systems handle everything for our pets automatically.
For the modern professional, the elderly, or multi-pet households, smart home pet products have shifted from luxury gadgets to essential caregiving infrastructure. We are no longer just buying "toys"; we are deploying a fleet of pet-safe smart home devices designed to manage everything from caloric intake to psychological well-being. This article explores a "Day in the Life" within these high-tech habitats, demonstrating how smart home automation for pet care is redefining the human-animal bond.
Feature
Traditional Pet Home
High-Tech Pet Household (2025)
Feeding
Manual scooping / Fixed times
Automated feeding schedule via AI
Cleaning
Daily vacuuming & scooping
Self-cleaning pet environment
Engagement
Human-led play only
Interactive AI robot companion
Health
Reactive (Vet visits when sick)
Proactive (AI-backed health data)
Morning Routine: Automated Start and Intelligent Nutrition
In a modern home, the "morning rush" is gone for good. Your day no longer starts with a hungry pet waking you up at 5:00 AM. Instead, quiet machines follow a set feeding schedule.
New AI feeders do more than just drop food. They use scales and cameras to recognize each pet's face. This makes sure every animal gets the right amount of food. This tech is a big help if you have many pets and one likes to steal from the others.
The Intelligent Nutrition Workflow
6:00 AM: The smart feeder recognizes the pet using an AI collar. It drops a special mix of food based on how much the pet moved the day before.
6:15 AM: A smart fountain cleans and cools the water. It counts how often the pet drinks to track hydration. This helps catch kidney issues in cats early.
7:00 AM: You wake up and check your phone. An alert says: "Luna ate her food and drank enough water. All her vitals look perfect."
By automating these "alarm clock" duties, technology allows owners a more peaceful start to their day while ensuring their pets maintain peak nutritional health through automated pet care.
Midday Engagement: Keeping Loneliness at Bay with AI Companions
The most significant emotional shift in 2025 is the elimination of "pet-parent guilt." During working hours, the home transforms into an interactive playground.
The best robot for pets today isn't a stationary camera; it is an interactive AI robot companion (like the Enabot EBO or ORIBO series) that autonomously roams the house. These robots use LiDAR to navigate around furniture and "find" the pet to initiate play sessions.
The Role of AI in Reducing Separation Anxiety
For pets prone to distress, robots for pet separation anxiety act as a digital bridge. These tools use smart tech to spot "stress barks" or if a pet is "pacing." When this happens, they start a calm routine:
Remote Pet Checks: Clear 4K video lets you watch your pet while you are at work.
Talk Back Feature: You can use your own voice to help your pet feel safe.
Treat Tossing: Positive reinforcement is delivered remotely to reward calm behavior.
According to research from the Journal of Veterinary Behavior, automated behavior-shaping interventions using AI can significantly reduce signs of separation distress within 12 weeks of consistent use.
The Afternoon Hygiene Cycle: Self-Cleaning Environments
While the pets are playing, the self-cleaning pet environment is working behind the scenes. Hygiene is no longer a manual chore but a background process handled by specialized robotics.
The Hygiene Tech Stack
Pet Vacuums: Roomba j9+ or Roborock S8 use special brushes that don't clog, they are made just for pet hair. They also have cameras to avoid pet mess so they don't spread it all over your floors.
Auto Litter Boxes: The Litter-Robot 4 or PetSafe systems know when a pet leaves. They clean up right away. The waste goes into a sealed drawer with filters to stop smells.
Air Cleaners: Smart filters watch how much your pet moves. They work harder when pets play to catch hair and dust fast.
This setup keeps the house clean and fresh. When you get home, the house smells fresh, and you won't even notice a pet lives there.
Evening Bonding: Health Tracking and Data-Driven Wellness
In the evening, the focus shifts from automation to information. The AI-backed smart collar (such as Invoxia or Fi Series 3) has been collecting data all day.
The Evening "Data Check-In"
Owners can review a comprehensive dashboard of their pet’s health. This isn't just "steps"; it's a diagnostic look at:
Sleep Habits: Checking deep sleep to find signs of pain or body aches.
Itching and Grooming: Watching how much a pet scratches to spot allergies or skin issues early.
Breathing and Heart Rate: Keeping track of health stats that used to need a visit to the vet.
Expert Insight: "By 2025, 45% of the pet tech market will be dominated by healthcare solutions," reports Coherent Market Insights. This data allows for "Proactive Veterinary Care," where you can send a month's worth of data to your vet before an annual check-up.
Overcoming the Learning Curve: Tips for a Harmonious Coexistence
Introducing a robot into a pet's territory requires a "Fear-Free" approach. Some pets may view a roaming robot as a predator or a rival.
How to Introduce Pets to Robots
The "Scent Trick": Set the robot in a room but leave the power off for two days. This lets your pet sniff it and realize it is not a threat.
Treat Time: Lay a few good snacks on the machine while it sits still. This helps your pet like having it around.
Start Slow: When you turn the power on, use the quiet mode. Keep the speed as low as possible at first.
Stop the Fighting: If your dog starts acting mean toward the vacuum, use the app to set limits. Keep the robot away from the spots where your dog likes to relax.
Introduction Timeline Table
Day
Action
Goal
Day 1-2
Stationary / Powered Off
Normalize the object's presence
Day 3-4
Manual movement (Push it)
Show that it's harmless and predictable
Day 5-7
Low-power autonomous mode
Associate movement with treats
Day 10+
Full automation
Seamless integration
Conclusion: Is the High-Tech Pet Household Worth It?
The transition to a robot-integrated pet home represents a significant financial investment, with the global smart pet products market projected to exceed $15 billion by late 2025. However, the "Return on Investment" is measured in more than just dollars.
By offloading the "dirty work" of scooping, cleaning, and scheduled feeding to machines, we reclaim the most precious aspect of pet ownership: quality time. A high-tech pet household isn't about replacing the human; it’s about using pet-safe smart home devices to remove the friction of daily chores, allowing the human-animal bond to flourish in a clean, stimulated, and health-monitored environment.
As we look toward 2026 and beyond, these robots will not be seen as gadgets, but as a standard part of the family—the silent, tireless guardians of our four-legged friends.
FAQ
How do real pets react to robotic companions in the house?
Most pets start with a "checking things out" stage and then move to a "getting used to it" phase. Cats might see a moving robot as a strange invader, while active dogs may first chase it like a toy. However, most animals eventually learn to ignore them or even play along once they realize the robot means treats or fun. The best way to ensure a peaceful start is the "Fear-Free" method: just place treats on the robot while it is turned off. This helps them build a positive connection before it ever starts moving.
Is a high-tech household suitable for a senior living alone?
Actually, it is usually much safer. These tools lower the physical risks of caring for a pet. You won't trip over big water bowls or strain your back cleaning a litter box. Smart setups that work by voice—like asking Alexa to "feed the dog"—really help seniors with joint pain or mobility issues. They ensure the pet gets fed and stays happy without any hard physical work.
Can a robotic pet truly replace the emotional bond of a living animal?
Technology is not intended to replace the biological bond but to supplement it or act as a bridge. For those in settings where real pets are prohibited (such as certain assisted living facilities), a robotic companion provides the tactile and emotional comfort—purring, heartbeats, and responsiveness—that staves off loneliness without the ethical or physical complications of a living creature.